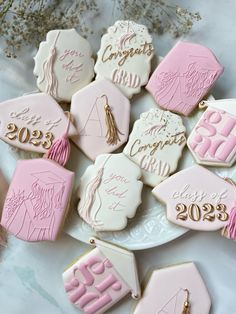
Graduation season is a truly special time, celebrating years of hard work, dedication, and dreams coming true. Planning a memorable party often centers around delicious food and festive treats that honor the graduate. We know you want to create a joyful atmosphere without feeling overwhelmed in the kitchen.
That’s precisely where these delightful grad cookies come in, offering a perfect blend of celebratory spirit and irresistible flavor. A platter of beautifully crafted graduation cookies can truly elevate any party spread. Imagine the smiles when guests spot these thoughtful, personalized sweets.
We’ve curated a collection of six truly cool grad cookies that are not only incredibly tasty but also fun to make and share. From classic decorated sugar cookies to inventive chocolate roll-ups, there’s a recipe here for every skill level and taste preference. These ideas use common ingredients and clever techniques. Get ready to bake some unforgettable memories.
6 Cool Grad Cookies for Graduation Parties
1. Classic Decorated Sugar Grad Cookies
These quintessential decorated sugar grad cookies are truly a blank canvas for your creativity, offering endless customization. They boast a tender, buttery crumb and hold their shape beautifully, perfect for intricate frosting designs. Their delicate vanilla aroma will fill your kitchen. These cookies become edible works of art, ideal for celebrating academic achievements.
- Preparation Time: 45 minutes (plus 1 hour chilling)
- Cooking Time: 10-12 minutes
- Servings: 24-30 cookies
- Estimated Nutrition Info (per cookie): Calories 150, Fat 8g, Carbs 18g, Protein 1g
Ingredients
| Ingredient | Quantity |
|---|---|
| Unsalted Butter, softened | 1 cup (2 sticks) |
| Granulated Sugar | 1 ½ cups |
| Large Egg | 1 |
| Vanilla Extract | 2 teaspoons |
| All-Purpose Flour | 3 cups |
| Baking Powder | ½ teaspoon |
| Salt | ¼ teaspoon |
| Powdered Sugar (for icing) | 4 cups |
| Milk (for icing) | 4-6 tablespoons |
| Light Corn Syrup (for icing) | 2 tablespoons |
| Almond Extract (for icing) | ½ teaspoon (optional) |
| Food Coloring (gel) | As desired |
Step by Step Instructions How to make
Step 1: Cream Butter and Sugar
Begin by beating the softened butter and granulated sugar together in a large bowl. Use an electric mixer on medium speed until the mixture becomes light and fluffy. This usually takes about 2-3 minutes of consistent mixing. Proper creaming creates air pockets, ensuring tender grad cookies.
Step 2: Add Wet Ingredients
Next, incorporate the large egg and the fragrant vanilla extract into the creamed butter mixture. Beat until these wet ingredients are thoroughly combined and smooth. Ensure there are no streaks of egg visible, achieving a uniform consistency for your cookie dough.
Step 3: Combine Dry Ingredients
In a separate medium bowl, whisk together the all-purpose flour, baking powder, and salt. This step ensures that all leavening agents and seasonings are evenly distributed. A well-mixed dry component prevents pockets of unmixed ingredients in your finished grad cookies.
Step 4: Gradually Add Dry to Wet
Slowly add the dry ingredient mixture to the wet ingredients, mixing on low speed until just combined. Be careful not to overmix the dough, as this can develop the gluten too much. Overworked dough often results in tough, less tender grad cookies.
Step 5: Chill the Dough
Divide the dough into two equal portions and flatten each into a disc. Wrap each disc tightly in plastic wrap and refrigerate for at least one hour. Chilling is essential for firming the dough, making it easier to roll and cut precise cookie shapes. This prevents spreading.
Step 6: Roll and Cut
Preheat your oven to 375°F (190°C) and line baking sheets with parchment paper. On a lightly floured surface, roll out one disc of chilled dough to about ¼-inch thickness. Use graduation-themed cookie cutters, like caps or diplomas, to cut out your grad cookies.
Step 7: Bake the Cookies
Carefully transfer the cut-out cookies to the prepared baking sheets. Bake for 10-12 minutes, or until the edges are lightly golden brown. Remove from the oven and let them cool on the baking sheets for a few minutes before transferring to a wire rack.
Step 8: Prepare Royal Icing
For the royal icing, combine powdered sugar, milk, light corn syrup, and almond extract (if using) in a bowl. Whisk until smooth and lump-free, adjusting milk for desired consistency. Divide the icing into separate bowls and tint with gel food coloring to match school colors or party themes.
Step 9: Decorate Your Grad Cookies
Once the grad cookies are completely cool, unleash your creativity with the colored royal icing. Use piping bags with fine tips to outline designs, then flood with a slightly thinner icing consistency. Allow adequate drying time between layers for crisp, professional-looking decorations.
Why You’ll Love It
These classic sugar grad cookies are incredibly versatile and perfect for personalizing any graduation celebration. You can easily adapt them to different school colors, names, or graduation years. Swap almond extract for lemon or orange for a different flavor profile, or even add a hint of cinnamon to the dough for warmth. They are truly the ultimate canvas for edible art.
2. Chocolate “Diploma” Roll-Up Grad Cookies

These unique chocolate “diploma” roll-up grad cookies are a delightful twist on a classic, resembling rolled-up diplomas tied with edible ribbons. The rich cocoa flavor is perfectly balanced with a subtle sweetness, offering a truly indulgent treat. They’re surprisingly easy to make and guaranteed to impress your graduates and guests. The soft texture melts in your mouth.
- Preparation Time: 30 minutes (plus 30 minutes chilling)
- Cooking Time: 10-12 minutes
- Servings: 20-24 cookies
- Estimated Nutrition Info (per cookie): Calories 160, Fat 9g, Carbs 19g, Protein 2g
Ingredients
| Ingredient | Quantity |
|---|---|
| All-Purpose Flour | 1 ¾ cups |
| Unsweetened Cocoa Powder | ½ cup |
| Baking Soda | 1 teaspoon |
| Salt | ½ teaspoon |
| Unsalted Butter, softened | 1 cup (2 sticks) |
| Granulated Sugar | 1 cup |
| Brown Sugar, packed | ½ cup |
| Large Egg | 1 |
| Vanilla Extract | 1 teaspoon |
| White Chocolate, melted | ½ cup |
| Red Licorice Laces | For “ribbons” |
Step by Step Instructions How to make
Step 1: Whisk Dry Ingredients
In a medium bowl, combine the all-purpose flour, unsweetened cocoa powder, baking soda, and salt. Whisk these dry ingredients together thoroughly to ensure even distribution. This crucial step prevents clumps and guarantees a consistent chocolate flavor in every bite.
Step 2: Cream Butter and Sugars
In a large mixing bowl, cream together the softened unsalted butter, granulated sugar, and packed brown sugar. Beat with an electric mixer until the mixture is light, fluffy, and well-combined. This process usually takes about 3-4 minutes, creating a creamy foundation for your grad cookies.
Step 3: Incorporate Egg and Vanilla
Beat in the large egg and the vanilla extract into the creamed butter mixture. Continue mixing until everything is fully incorporated and smooth, scraping down the sides of the bowl as needed. This ensures all elements are integrated before adding the dry mixture.
Step 4: Gradually Add Dry to Wet
With the mixer on low speed, slowly add the whisked dry ingredients to the wet mixture. Mix only until the flour and cocoa streaks disappear and a soft dough forms. Be careful not to overmix, which can lead to tough chocolate grad cookies.
Step 5: Chill the Dough
Gather the dough into a ball, flatten it slightly, and wrap it tightly in plastic wrap. Refrigerate the dough for at least 30 minutes. Chilling is important to firm up the dough, making it easier to handle and roll for creating the diploma shapes without sticking.
Step 6: Roll and Cut Dough
On a lightly floured surface, roll out the chilled dough into a large rectangle, about 1/8-inch thick. Using a sharp knife or pizza cutter, cut the dough into rectangles approximately 3×4 inches in size. These will become your diploma grad cookies.
Step 7: Form Diplomas
Starting from one of the longer sides, gently roll each chocolate rectangle into a tight cylinder, mimicking a rolled diploma. Place the rolled cookies seam-side down on a baking sheet lined with parchment paper. Ensure they have a little space between each other.
Step 8: Bake the Cookies
Preheat your oven to 350°F (175°C). Bake the chocolate “diploma” grad cookies for 10-12 minutes. The cookies should be set but still soft in the center when removed from the oven. Let them cool on the baking sheet for a few minutes before transferring to a wire rack.
Step 9: Decorate with White Chocolate
Once the cookies are completely cool, melt white chocolate using a double boiler or microwave. Dip one end of each cookie into the melted white chocolate, creating the “wax seal” effect. Immediately press a short piece of red licorice lace into the white chocolate as a “ribbon.”
Step 10: Let Set
Allow the white chocolate to fully set before storing or serving your chocolate diploma grad cookies. You can place them in the refrigerator for a few minutes to speed up this process. These look wonderfully authentic and taste even better.
Why You’ll Love It
These chocolate “diploma” grad cookies are incredibly fun and visually striking, offering a rich chocolate flavor that everyone adores. You can easily swap red licorice for other colors to match school themes, or use different flavors of melting chocolate for the “seal.” A sprinkle of edible glitter on the white chocolate adds extra sparkle. They are the perfect unique treat for any graduation party.
3. “Cap” Brownie Grad Cookies

Imagine a rich, fudgy brownie combined with the delightful chew of a cookie, shaped like a graduation cap. These “Cap” Brownie Grad Cookies are exactly that – a decadent, chocolatey dream come true. They are incredibly moist and intensely flavored, making them an irresistible addition to any celebration. The hint of espresso powder enhances the deep cocoa notes.
- Preparation Time: 25 minutes
- Cooking Time: 10-12 minutes
- Servings: 24 cookies
- Estimated Nutrition Info (per cookie): Calories 180, Fat 11g, Carbs 20g, Protein 2g
Ingredients
| Ingredient | Quantity |
|---|---|
| All-Purpose Flour | 1 ¼ cups |
| Unsweetened Cocoa Powder | ½ cup |
| Baking Powder | ½ teaspoon |
| Salt | ¼ teaspoon |
| Unsalted Butter, melted | ½ cup (1 stick) |
| Granulated Sugar | 1 ½ cups |
| Large Eggs | 2 |
| Vanilla Extract | 1 teaspoon |
| Espresso Powder (optional) | ½ teaspoon |
| Powdered Sugar (for icing) | 2 cups |
| Milk (for icing) | 2-3 tablespoons |
| Food Coloring (gel, black) | As desired |
| Chocolate Candies (square) | 24 (e.g., Ghirardelli squares) |
| Fruit Roll-Ups or Fondant | For tassels |
Step by Step Instructions How to make
Step 1: Whisk Dry Ingredients
In a medium bowl, whisk together the all-purpose flour, unsweetened cocoa powder, baking powder, and salt. Ensure these dry ingredients are thoroughly combined and lump-free. This foundational step helps create the perfect texture for your fudgy brownie grad cookies.
Step 2: Mix Melted Butter and Sugar
In a large bowl, combine the melted butter and granulated sugar. Whisk vigorously for about one minute until fully incorporated and glossy. This creates a rich, shiny base, contributing to the signature fudgy texture of these brownie grad cookies.
Step 3: Add Eggs and Vanilla
Beat in the two large eggs one at a time, mixing well after each addition. Stir in the vanilla extract and optional espresso powder. Continue mixing until the batter is smooth and well-emulsified. The espresso subtly deepens the chocolate flavor.
Step 4: Combine Wet and Dry
Gradually add the dry ingredient mixture to the wet ingredients, mixing on low speed until just combined. Be very careful not to overmix the dough. Overmixing can lead to a tougher cookie texture, which is undesirable for these soft brownie grad cookies.
Step 5: Drop and Bake
Drop rounded tablespoons of the brownie cookie dough onto baking sheets lined with parchment paper, leaving about 2 inches between each cookie. Preheat oven to 350°F (175°C). Bake for 10-12 minutes, until the edges are set but the centers are still soft and slightly gooey.
Step 6: Cool Cookies
Allow the brownie cookies to cool on the baking sheets for 5-7 minutes before carefully transferring them to a wire rack to cool completely. These cookies are delicate when warm, so handling them gently is key to maintaining their shape.
Step 7: Prepare Black Icing
While the cookies cool, prepare a simple glaze by whisking powdered sugar with milk until smooth. Add black gel food coloring a tiny bit at a time until you achieve a deep, rich black color. This will form the base of your graduation cap.
Step 8: Assemble Graduation Caps
Once the cookies are completely cool, spread a thin layer of black icing over each round cookie. While the icing is still wet, place a square chocolate candy on top of each cookie. Position it slightly off-center to mimic the cap’s flat top.
Step 9: Add Tassels
Cut thin strips from fruit roll-ups or roll out thin ropes of colored fondant to create the tassels. Gently attach one end of the “tassel” to the corner of the chocolate square. You can use a tiny dot of icing to secure it if needed, completing your grad cookies.
Why You’ll Love It
These “Cap” Brownie Grad Cookies are incredibly rich and satisfying, offering a wonderful chewy texture reminiscent of a brownie. They’re surprisingly simple to assemble and look very impressive, perfectly capturing the graduation theme. You can use different colored fruit roll-ups for tassels to match school colors, or even add a touch of edible gold dust for extra flair.
4. Peanut Butter “Smartie” Grad Cookies

Bring a burst of color and classic comfort to your graduation celebration with these delightful Peanut Butter “Smartie” Grad Cookies. These soft, chewy cookies are packed with rich peanut butter flavor and studded with colorful Smarties candies. They are a fun, playful twist on a beloved cookie, sure to be a hit with graduates of all ages. Their vibrant appearance is truly eye-catching.
- Preparation Time: 20 minutes
- Cooking Time: 10-12 minutes
- Servings: 30 cookies
- Estimated Nutrition Info (per cookie): Calories 140, Fat 8g, Carbs 15g, Protein 3g
Ingredients
| Ingredient | Quantity |
|---|---|
| All-Purpose Flour | 1 ½ cups |
| Baking Soda | 1 teaspoon |
| Salt | ½ teaspoon |
| Unsalted Butter, softened | ½ cup (1 stick) |
| Granulated Sugar | ½ cup |
| Brown Sugar, packed | ½ cup |
| Creamy Peanut Butter | 1 cup |
| Large Egg | 1 |
| Vanilla Extract | 1 teaspoon |
| Smarties Candies | 1 ½ cups |
Step by Step Instructions How to make
Step 1: Whisk Dry Ingredients
In a medium bowl, whisk together the all-purpose flour, baking soda, and salt. Make sure these dry ingredients are thoroughly combined. This ensures even distribution and contributes to the perfect texture of your peanut butter grad cookies.
Step 2: Cream Butter and Sugars
In a large mixing bowl, cream together the softened unsalted butter, granulated sugar, and packed brown sugar. Beat with an electric mixer until the mixture is light and fluffy, usually for about 2-3 minutes. This forms a sweet, airy base for the cookies.
Step 3: Add Peanut Butter, Egg, and Vanilla
Beat in the creamy peanut butter until well combined, then add the large egg and vanilla extract. Continue mixing until the wet ingredients are thoroughly incorporated and smooth. This creates that irresistible peanut butter flavor profile.
Step 4: Combine Wet and Dry Ingredients
Gradually add the whisked dry ingredients to the wet mixture, mixing on low speed until just combined. Be careful not to overmix, as this can result in tough cookies. Stop as soon as the flour streaks disappear, ensuring a tender bite.
Step 5: Fold in Smarties
Gently fold in the Smarties candies by hand. Distribute them evenly throughout the dough. Reserve a handful of candies to press into the tops of the cookies later for extra visual appeal. These colorful additions make them truly festive grad cookies.
Step 6: Form and Chill Cookie Dough
Roll the cookie dough into 1.5-inch balls. If desired, lightly press a few extra Smarties into the tops of each ball for decoration. Place the formed cookie dough balls on a plate and chill in the refrigerator for at least 15 minutes. This helps prevent spreading.
Step 7: Bake Cookies
Preheat your oven to 375°F (190°C). Arrange the chilled cookie dough balls on baking sheets lined with parchment paper, leaving about 2 inches between each. Bake for 10-12 minutes, or until the edges are lightly golden and the centers are still soft.
Step 8: Cool and Serve
Remove the peanut butter grad cookies from the oven and let them cool on the baking sheets for a few minutes. Then, transfer them to a wire rack to cool completely. The candies will become slightly melted and gooey, adding delightful texture.
Why You’ll Love It
These Peanut Butter “Smartie” Grad Cookies are a crowd-pleaser, offering a comforting flavor profile with a fun, festive pop of color. They’re quick to make and require no elaborate decoration, making them ideal for busy party planners. Feel free to swap Smarties for M&M’s in school colors or add a sprinkle of sea salt for a sweet and salty kick.
5. Lemon “Honor Roll” Crinkle Grad Cookies
Brighten any graduation celebration with these zesty Lemon “Honor Roll” Crinkle Grad Cookies. Bursting with fresh lemon flavor and a beautiful crackled, powdered sugar coating, they are as delightful to look at as they are to eat. Their soft, chewy texture and tangy sweetness make them a refreshing departure from traditional grad cookies. The citrus aroma is truly invigorating.
- Preparation Time: 20 minutes (plus 30 minutes chilling)
- Cooking Time: 10-12 minutes
- Servings: 24 cookies
- Estimated Nutrition Info (per cookie): Calories 130, Fat 6g, Carbs 18g, Protein 1g
Ingredients
| Ingredient | Quantity |
|---|---|
| All-Purpose Flour | 1 ½ cups |
| Baking Powder | 1 teaspoon |
| Salt | ¼ teaspoon |
| Unsalted Butter, softened | ½ cup (1 stick) |
| Granulated Sugar | 1 cup |
| Large Egg | 1 |
| Lemon Zest | 2 tablespoons |
| Fresh Lemon Juice | 2 tablespoons |
| Vanilla Extract | ½ teaspoon |
| Powdered Sugar (for rolling) | ½ cup |
Step by Step Instructions How to make
Step 1: Whisk Dry Ingredients
In a medium bowl, combine the all-purpose flour, baking powder, and salt. Whisk these dry ingredients together thoroughly to ensure they are well-mixed. This step is crucial for the cookies to rise properly and have a uniform texture, ensuring perfect grad cookies.
Step 2: Cream Butter and Sugar
In a large mixing bowl, cream together the softened unsalted butter and granulated sugar until light and fluffy. Use an electric mixer on medium speed for about 2-3 minutes. This creates an airy base that contributes to the cookies’ tender crumb.
Step 3: Add Wet Ingredients
Beat in the large egg, fresh lemon zest, fresh lemon juice, and vanilla extract. Mix until these wet ingredients are fully incorporated and the mixture is smooth. The lemon zest and juice are key to the vibrant flavor of these lemon grad cookies.
Step 4: Combine Wet and Dry
Gradually add the whisked dry ingredients to the wet mixture, mixing on low speed until just combined. Be careful not to overmix the dough. Overworking the dough can lead to tough cookies, so stop as soon as the flour disappears.
Step 5: Chill the Dough
Gather the dough into a ball, flatten it slightly, and wrap it tightly in plastic wrap. Refrigerate the dough for at least 30 minutes. Chilling the dough helps it firm up, making it easier to handle and roll, and preventing excessive spreading during baking.
Step 6: Roll in Powdered Sugar
Preheat your oven to 350°F (175°C). Pour the powdered sugar into a shallow bowl. Scoop rounded tablespoons of chilled dough and roll each into a smooth ball. Generously roll each dough ball in the powdered sugar, ensuring a thick coating. This creates the crinkle effect.
Step 7: Bake the Cookies
Place the sugar-coated dough balls onto baking sheets lined with parchment paper, leaving about 2 inches between each. Bake for 10-12 minutes, or until the edges are set and the cookies are puffed and lightly cracked. Do not overbake to maintain softness.
Step 8: Cool and Serve
Remove the lemon crinkle grad cookies from the oven and let them cool on the baking sheets for a few minutes. Then, transfer them to a wire rack to cool completely. The cracks will become more prominent as they cool, revealing the beautiful crinkle pattern.
Why You’ll Love It
These Lemon “Honor Roll” Crinkle Grad Cookies are wonderfully refreshing and offer a delightful contrast of tangy lemon and sweet powdered sugar. Their distinctive appearance makes them stand out on any dessert table. For an extra citrus punch, add a drop of lemon extract to the dough, or garnish with a sprinkle of fresh lemon zest after baking.
6. Oatmeal “Future’s Bright” Grad Cookies
These Oatmeal “Future’s Bright” Grad Cookies are a wholesome and comforting option, perfect for sending graduates off to their next chapter. Packed with hearty oats and a touch of cinnamon, they offer a chewy texture and a satisfyingly warm flavor profile. These substantial cookies feel like a warm hug, a sweet reminder of home and encouragement.
- Preparation Time: 20 minutes (plus 15 minutes chilling)
- Cooking Time: 12-14 minutes
- Servings: 28-30 cookies
- Estimated Nutrition Info (per cookie): Calories 155, Fat 7g, Carbs 20g, Protein 2g
Ingredients
| Ingredient | Quantity |
|---|---|
| All-Purpose Flour | 1 ½ cups |
| Rolled Oats | 1 ½ cups |
| Baking Soda | 1 teaspoon |
| Ground Cinnamon | 1 teaspoon |
| Salt | ½ teaspoon |
| Unsalted Butter, softened | 1 cup (2 sticks) |
| Granulated Sugar | ¾ cup |
| Brown Sugar, packed | ¾ cup |
| Large Eggs | 2 |
| Vanilla Extract | 1 teaspoon |
| White Chocolate Chips | 1 cup |
| Sprinkles (gold/silver) | For decoration |
Step by Step Instructions How to make
Step 1: Whisk Dry Ingredients
In a medium bowl, whisk together the all-purpose flour, rolled oats, baking soda, ground cinnamon, and salt. Ensure these ingredients are thoroughly combined. The oats provide a wonderful chewy texture and hearty goodness to these grad cookies.
Step 2: Cream Butter and Sugars
In a large mixing bowl, cream together the softened unsalted butter, granulated sugar, and packed brown sugar. Beat with an electric mixer until light and fluffy, usually taking about 2-3 minutes. This creates a sweet, rich base for the cookie dough.
Step 3: Add Eggs and Vanilla
Beat in the two large eggs one at a time, mixing well after each addition. Stir in the vanilla extract until fully incorporated. This ensures the wet ingredients are well-blended, contributing to the moisture and flavor of the cookies.
Step 4: Combine Wet and Dry
Gradually add the whisked dry ingredients to the wet mixture, mixing on low speed until just combined. Be careful not to overmix the dough. Overworking the oats and flour can result in tough cookies, so stop as soon as the dry streaks disappear.
Step 5: Fold in White Chocolate Chips
Gently fold in the white chocolate chips by hand. Distribute them evenly throughout the dough. White chocolate adds a lovely creamy sweetness that complements the oats and cinnamon beautifully. These cookies are ready for a bright future.
Step 6: Chill the Dough
Drop rounded tablespoons of the cookie dough onto a plate and refrigerate for at least 15 minutes. Chilling helps the dough firm up, making it easier to handle and preventing the cookies from spreading too much during baking.
Step 7: Bake Cookies
Preheat your oven to 375°F (190°C). Arrange the chilled cookie dough balls on baking sheets lined with parchment paper, leaving about 2 inches between each. Bake for 12-14 minutes, or until the edges are golden brown and the centers are set.
Step 8: Cool and Decorate
Remove the oatmeal grad cookies from the oven and let them cool on the baking sheets for a few minutes. Then, transfer them to a wire rack to cool completely. While still warm, you can press a few gold or silver sprinkles onto the tops for a “Future’s Bright” effect.
Why You’ll Love It
These Oatmeal “Future’s Bright” Grad Cookies offer a comforting, wholesome option that’s both delicious and satisfying. They are incredibly versatile, allowing for easy substitutions and additions. Try adding dried cranberries or raisins for extra chewiness, or a sprinkle of flaky sea salt on top to enhance the flavors. A drizzle of melted caramel would also be delicious.
FAQ
What are the best cookie flavors for a graduation party?
The best cookie flavors for a graduation party often include classic crowd-pleasers like chocolate chip, peanut butter, and sugar cookies. Lemon or other citrus flavors are also popular for a refreshing touch. Offering a variety ensures there’s something for everyone to enjoy at the celebration.
How can I make graduation cookies look professional without advanced decorating skills?
You can achieve professional-looking grad cookies without advanced skills by using simple techniques. Try dipping cookies in melted chocolate and adding sprinkles, or use edible markers for easy writing. A simple flood icing with a single accent color also looks very polished and festive.
Can I prepare grad cookies ahead of time?
Absolutely, preparing grad cookies ahead of time is a fantastic idea for party planning. Most cookie doughs can be made and refrigerated for up to 3-5 days, or even frozen for several weeks. Baked cookies can be stored in airtight containers for a few days, or frozen for longer, perfect for busy hosts.
What are some gluten-free options for graduation cookies?
For gluten-free grad cookies, consider using gluten-free all-purpose flour blends in your recipes. Many existing cookie recipes can be adapted with a 1:1 gluten-free flour substitute. Additionally, naturally gluten-free options like meringue cookies or flourless peanut butter cookies are excellent choices that are safe for everyone.
How do I store decorated graduation cookies to keep them fresh?
To keep decorated graduation cookies fresh, store them in an airtight container at room temperature. If they have delicate icing, arrange them in a single layer or separate layers with parchment paper to prevent sticking and smudging. Avoid refrigerating decorated cookies unless specified, as condensation can damage the icing.
Cheers to Your Graduate!
We hope these “6 Cool Grad Cookies for Graduation Parties” have inspired you to create some truly special treats. Each recipe offers a unique flavor and visual appeal, perfectly suited for celebrating significant milestones. From the classic elegance of decorated sugar grad cookies to the comforting warmth of oatmeal, there’s a perfect match for your celebration here.
Whipping up a batch of these delightful grad cookies is a wonderful way to honor all the hard work and exciting futures ahead. Don’t be afraid to personalize them with school colors, graduation years, or heartfelt messages. These edible gestures will surely add an extra layer of joy and sweetness to the occasion. Be sure to save this article for future celebrations.