We’ve all been there — Easter is coming up fast, and you want something fun, festive, and not too complicated to share with family and friends. These royal icing designs on sugar cookies hit the sweet spot: they’re pretty enough for the holiday table but simple enough for a relaxed afternoon in the kitchen with the kids or on your own.
You don’t need to be a pro decorator. With a basic sugar cookie dough and a reliable royal icing, you can create eye-catching treats that look bakery-worthy. One batch of dough usually makes about 24-36 cookies depending on your cutter size, and the icing sets firm in just a couple of hours so you can stack or package them without smudging.
This roundup brings together 7 delicious Easter cookies royal icing designs featuring pastel colors, spring themes like bunnies, chicks, eggs, carrots, and flowers. You’ll find a mix of wet-on-wet techniques for quick marbling, piped details for more precision, and easy add-ons like sprinkles or mini marshmallows. The recipes use common pantry ingredients with smart swaps for dietary needs, plus plenty of flexibility for beginners or busy bakers.
If you love these, check out our other spring baking ideas for more holiday inspiration.
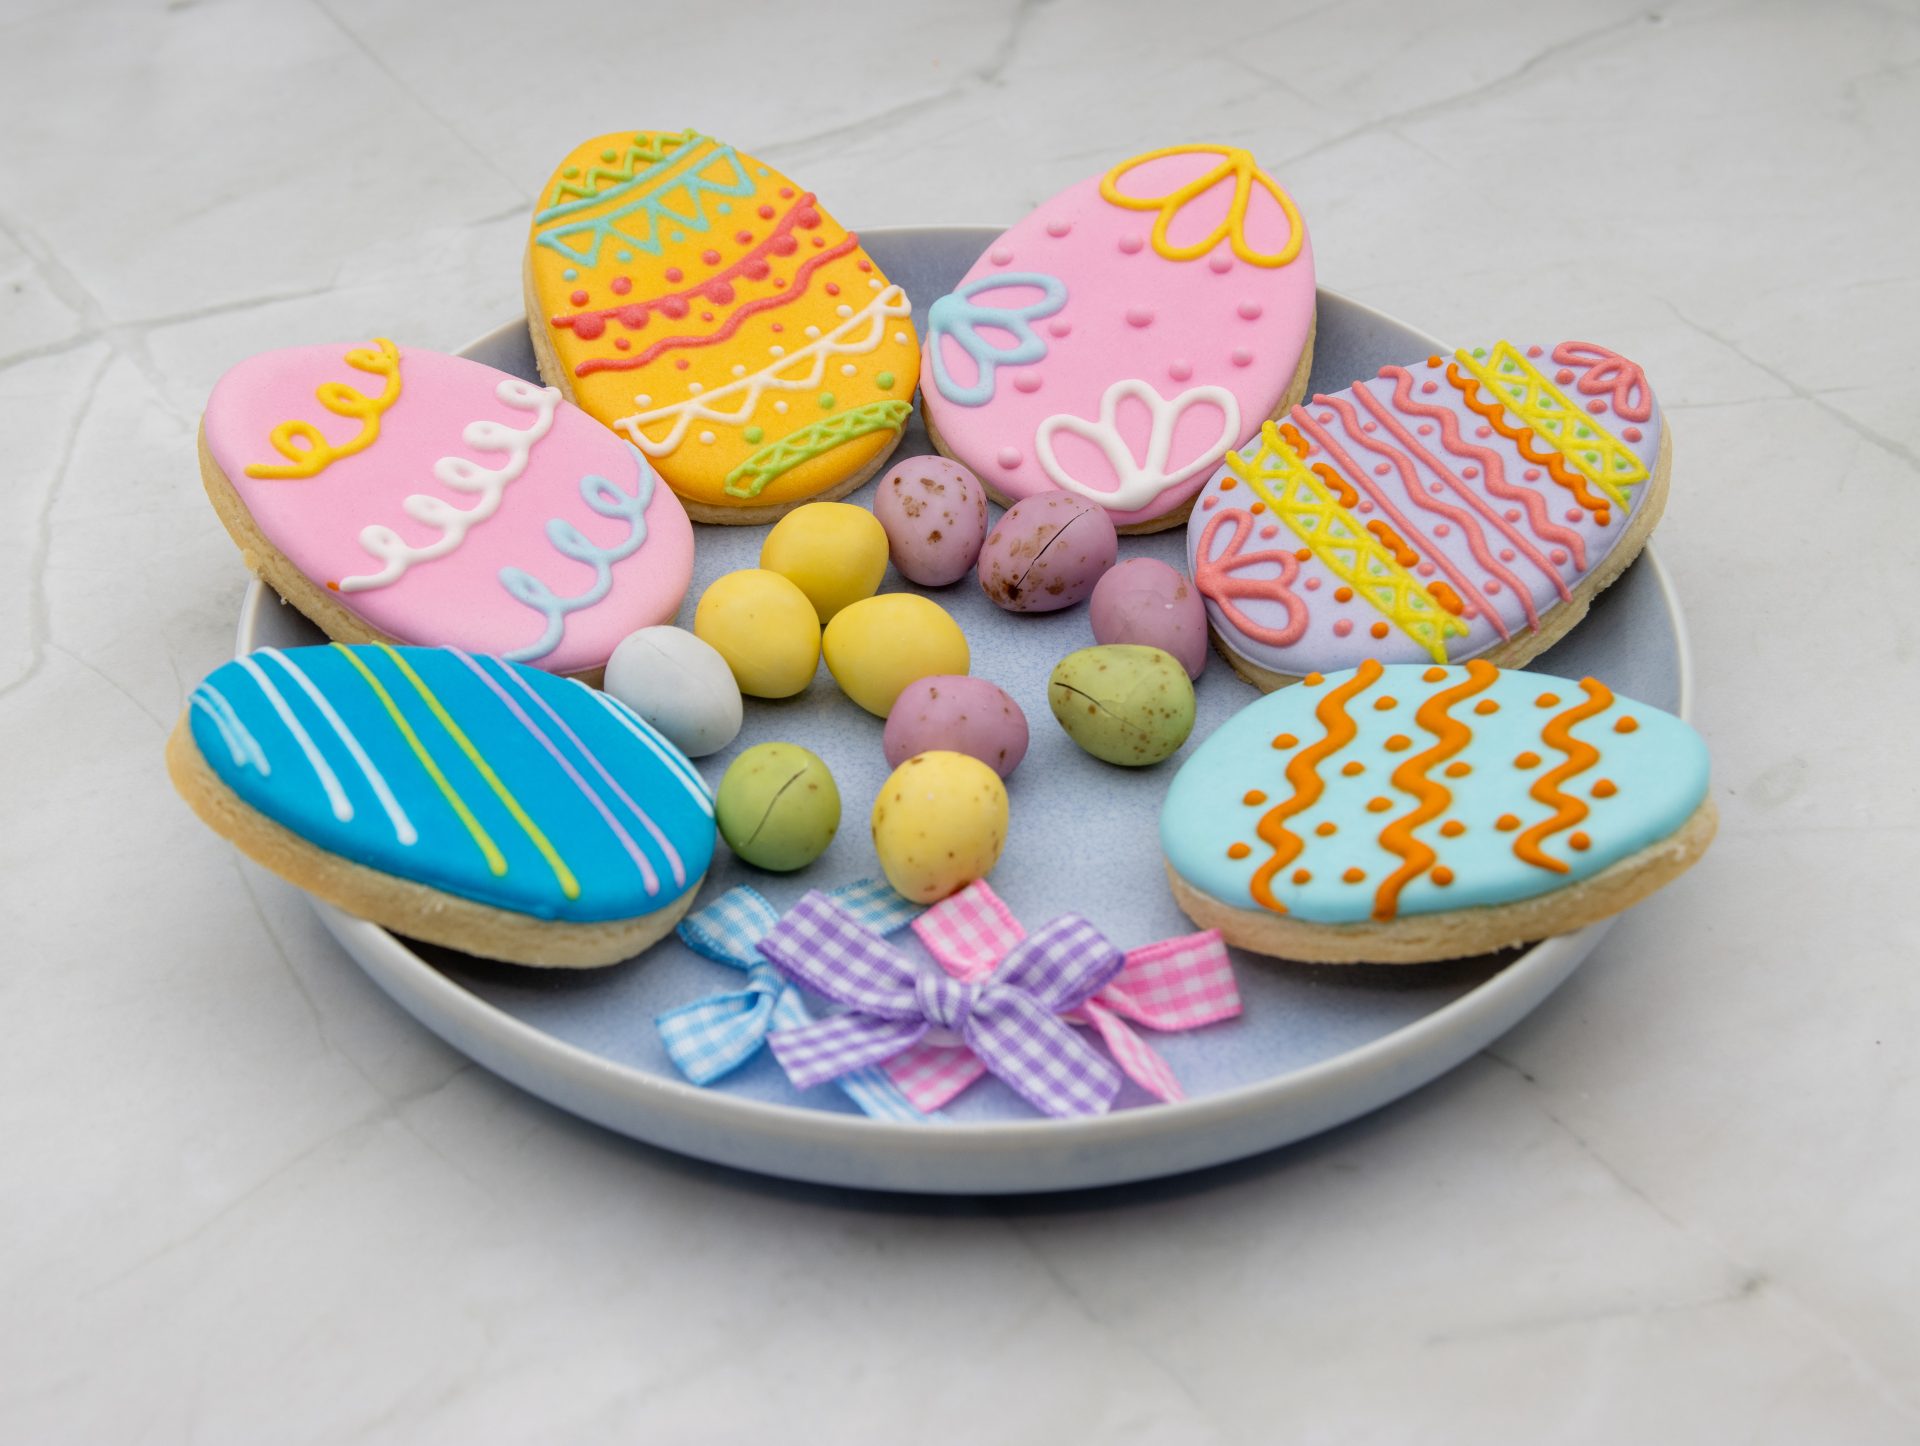
Classic Pastel Easter Egg Cookies with Royal Icing
These cookies bring back all the joy of dyeing eggs as a kid, but with a crisp buttery base and smooth, glossy royal icing that tastes lightly sweet with a hint of vanilla. The pastel shades — soft pink, yellow, blue, and lavender — look so cheerful piled on a platter, and the simple dot or line designs add just enough detail without stress. They’re perfect for a last-minute Easter brunch since you can bake the cookies ahead and decorate in one relaxing session.
Preparation Time: 30 minutes (plus chilling) Cooking Time: 10-12 minutes Servings: 24 cookies Estimated Nutrition Info: Per cookie (un-iced): ~120 calories, 2g protein, 15g carbs, 6g fat (values vary with icing and size)
Ingredients
| Ingredient | Amount |
|---|---|
| Unsalted butter, softened | ¾ cup (170g) |
| Granulated sugar | ¾ cup (150g) |
| Large egg | 1 |
| Vanilla extract | 2 tsp |
| All-purpose flour | 2¼ cups (280g) |
| Baking powder | 1 tsp |
| Salt | ¼ tsp |
For royal icing:
- 4 cups (480g) powdered sugar
- 3 Tbsp meringue powder
- 9-10 Tbsp room-temperature water
- Gel food colors (pastel pink, yellow, blue, lavender)
- Sprinkles or edible glitter (optional)
Instructions
- Cream butter and sugar until light and fluffy, about 2-3 minutes.
- Beat in egg and vanilla until combined.
- Whisk flour, baking powder, and salt in a separate bowl, then mix into wet ingredients until a soft dough forms.
- Divide dough in half, flatten into disks, wrap in plastic, and chill for at least 1 hour.
- Preheat oven to 350°F (175°C). Roll dough to ¼-inch thick on a lightly floured surface.
- Cut into egg shapes and place on parchment-lined baking sheets.
- Bake 10-12 minutes until edges are just golden. Cool completely on wire racks.
- For icing: Mix powdered sugar, meringue powder, and water on low until combined, then whip on high 1-2 minutes to stiff peaks. Thin with extra water for flood consistency (10-second ribbon).
- Divide icing into bowls and tint with gel colors. Outline cookies with stiff icing, then flood with thinned icing. Add dots or stripes while wet for designs. Let set 2 hours.
Why You’ll Love It These Easter egg cookies are endlessly customizable — swap colors to match your table or let kids add their own squiggles. The dough freezes well for up to 3 months, making them ideal for meal-prep style holiday baking. (Try almond extract instead of vanilla for a subtle nutty twist.)

Adorable Easter Bunny Face Cookies
Biting into these gives you that perfect tender cookie snap with creamy royal icing that melts slightly on your tongue. The bunny faces feature sweet little pink cheeks, dot eyes, and fluffy white ears that look almost too cute to eat. A quick sprinkle of sanding sugar on the ears adds a fun crunch. They’re weeknight-friendly once the dough is chilled and great for gifting in cellophane bags.
Preparation Time: 40 minutes (plus chilling) Cooking Time: 10-12 minutes Servings: 24 cookies Estimated Nutrition Info: Per cookie: ~130 calories, 2g protein, 16g carbs, 6g fat
Ingredients
| Ingredient | Amount |
|---|---|
| Unsalted butter, softened | ¾ cup |
| Granulated sugar | ¾ cup |
| Large egg | 1 |
| Vanilla extract | 1½ tsp |
| Almond extract (optional) | ½ tsp |
| All-purpose flour | 2¼ cups |
| Baking powder | 1 tsp |
| Salt | ¼ tsp |
Royal icing: same base as above, plus pink and black gel colors, sanding sugar, mini marshmallows (halved for tails if desired)
Instructions
- Cream butter and sugar until fluffy. Add egg and extracts.
- Mix in dry ingredients until dough forms. Chill 1-2 hours.
- Roll to ¼-inch thick, cut bunny shapes, and bake at 350°F for 10-12 minutes. Cool fully.
- Prepare royal icing to stiff and flood consistencies.
- Outline bunny head and ears with white stiff icing. Flood ears with white and sprinkle sanding sugar immediately.
- Flood face with white or light pink. Add pink cheeks, black dot eyes, and a nose with a toothpick or fine tip.
- Attach halved marshmallow tail with a dot of icing while wet if using. Let dry 2+ hours.
Why You’ll Love It Kids go wild for these bunny cookies, and you can simplify by skipping the face details for plain white bunnies with sugar ears. The almond extract adds bakery flavor, but skip it for nut-free versions. Perfect for spring parties or as a fun afternoon activity.

Cheerful Spring Chick in Egg Cookies
The contrast of bright yellow chicks peeking out of crackled white egg shells creates such a happy spring vibe. The cookie itself is soft and buttery, while the royal icing dries to a smooth, shiny finish with a gentle sweetness. Wet-on-wet marbling on the egg shell gives a realistic cracked look in minutes. These are budget-friendly and scale easily for larger crowds.
Preparation Time: 35 minutes (plus chilling) Cooking Time: 10-12 minutes Servings: 20-24 cookies Estimated Nutrition Info: Per cookie: ~125 calories, 2g protein, 15g carbs, 6g fat
Ingredients
Sugar cookie base: same as bunny recipe above. Royal icing: white, yellow, orange gel colors. Optional: light blue for background.
Instructions
- Prepare and chill sugar cookie dough as directed.
- Cut egg shapes (or oval cutters) and bake at 350°F for 10-12 minutes. Cool.
- Mix royal icing. Outline the egg with white stiff icing, leaving a jagged “crack” opening at the top.
- Flood the shell area with thinned white icing. Immediately drag a toothpick through drops of blue or yellow for crackle effect.
- Flood the chick area with yellow icing. Add orange beak and black dot eye once slightly set.
- Pipe tiny feet or wings if desired. Allow full set for 2 hours.
Why You’ll Love It These chick cookies feel playful yet elegant and work great as place cards with names piped on the shell. Use cookie glaze instead of royal icing for a softer bite if you prefer less crunch. Great for beginners since the crackle hides small imperfections.

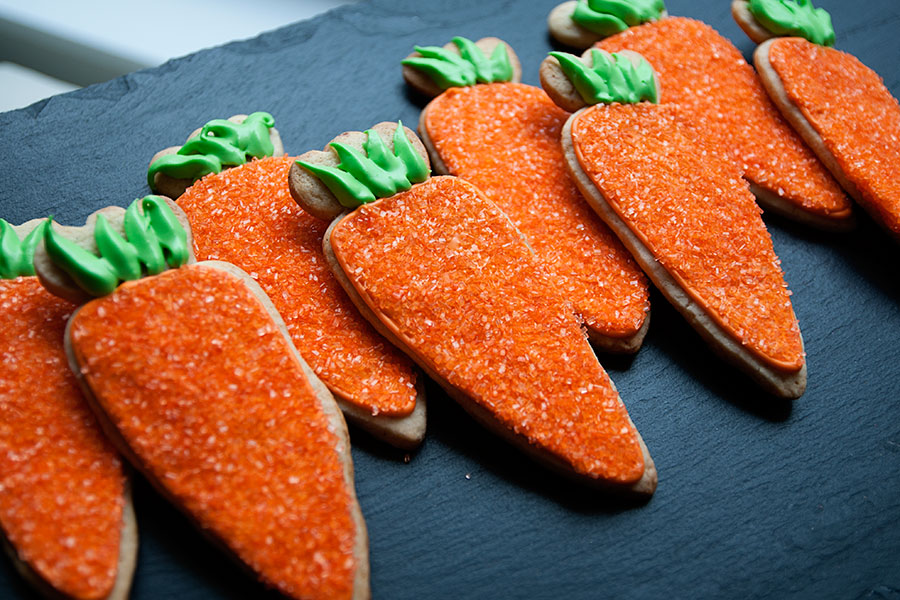
Fresh Carrot Cookies with Royal Icing Tops
Crisp edges meet a soft center in these carrot-shaped cookies, topped with vibrant orange icing and textured green “leaves” made from piped lines or sprinkles. The royal icing adds a bright, citrusy pop when you add a touch of lemon extract. They’re surprisingly quick to decorate and feel like a fresh addition to any Easter basket.
Preparation Time: 30 minutes (plus chilling) Cooking Time: 10-12 minutes Servings: 24 cookies Estimated Nutrition Info: Per cookie: ~130 calories, 2g protein, 17g carbs, 6g fat
Ingredients
Sugar cookie dough (same base). Royal icing: orange, green gel colors, green sanding sugar or sprinkles.
Instructions
- Make and chill dough. Cut carrot shapes. Bake at 350°F, 10-12 minutes. Cool.
- Prepare royal icing. Outline carrot body with orange stiff icing and flood.
- While wet, add green icing at the top for stems. Immediately sprinkle green sanding sugar on the stems.
- Once body sets (about 30 minutes), pipe thin green lines for more leaf detail if wanted.
- Let everything dry fully, about 2 hours.
Why You’ll Love It Carrot cookies pair wonderfully with other spring treats and store beautifully for up to a week in an airtight container. Swap green sprinkles for piped leaves to save time, or add a pinch of cinnamon to the dough for warm spice notes.
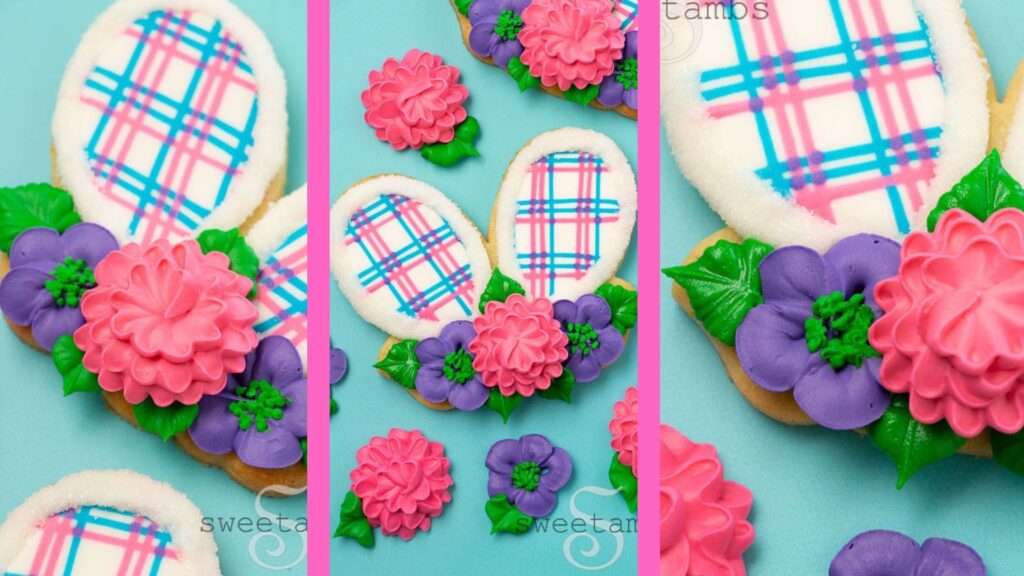
Delicate Floral Easter Bunny Cookies
These bunnies wear pretty floral crowns or scattered blossoms made with simple piped dots and petals in soft pastels. The cookie base stays tender, and the royal icing flowers have a delicate crunch that contrasts nicely with the smooth base layer. They bring a garden-party feel and look stunning arranged on a tiered stand.
Preparation Time: 45 minutes (plus chilling) Cooking Time: 10-12 minutes Servings: 20 cookies Estimated Nutrition Info: Per cookie: ~135 calories, 2g protein, 16g carbs, 7g fat
Ingredients
Sugar cookie base. Royal icing in white, pink, yellow, lavender; fine piping tip for flowers.
Instructions
- Prepare dough, chill, cut bunny shapes, bake, and cool.
- Flood bunny body with white or light pink icing and let set.
- Pipe small flower centers with yellow dots, then add 4-5 petal shapes around each using a #2 or #1 tip.
- Add tiny leaves in green with quick drag lines.
- Scatter additional dots or hearts for extra charm. Dry completely.
Why You’ll Love It Floral designs feel special for Easter without requiring advanced skills — practice a few flowers on parchment first. These hold up well for gifting and taste just as good as they look. Try lemon zest in the dough for a bright lift.
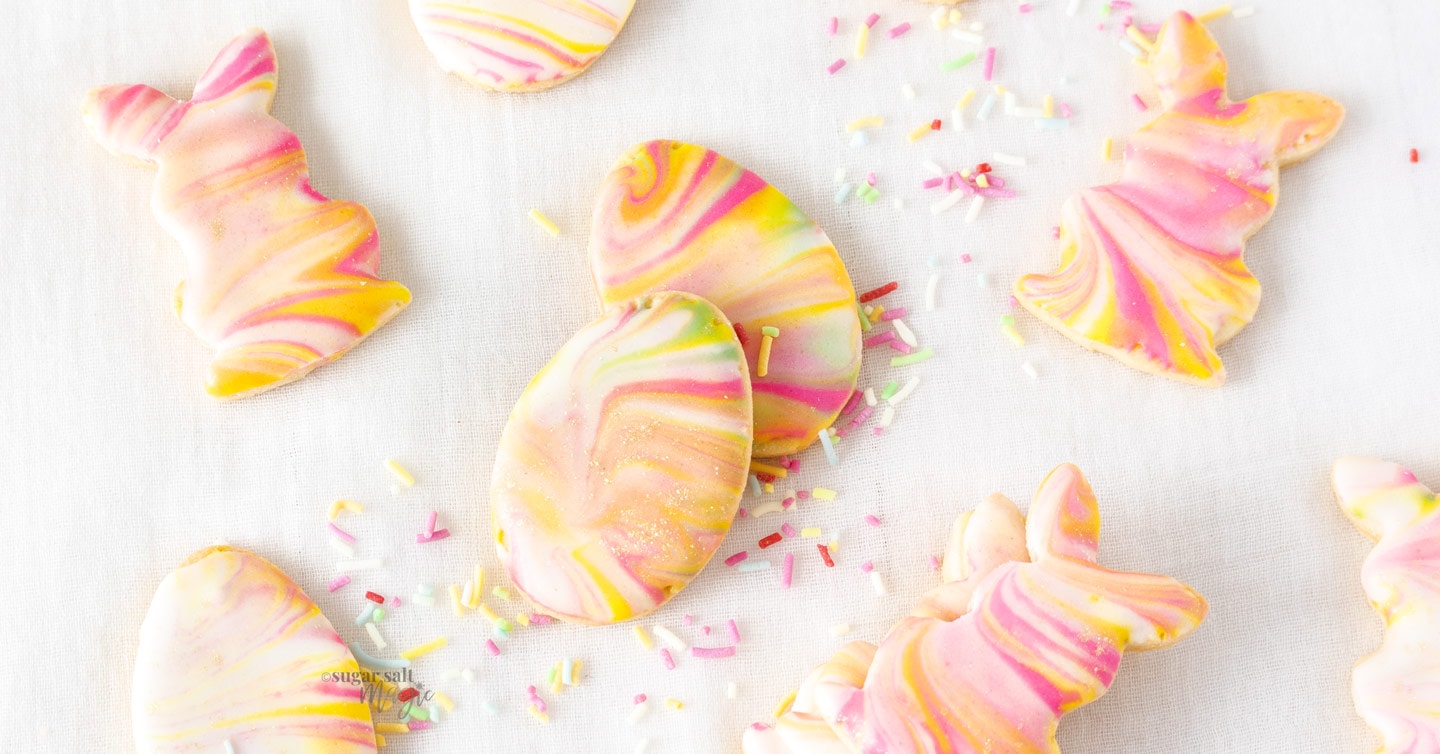
Marbled Wet-on-Wet Easter Egg Cookies
The swirling pastel colors on these eggs create a beautiful watercolor effect that looks impressive but takes under 5 minutes per cookie once you get the hang of it. The base cookie is lightly vanilla-scented and crisp, while the icing stays smooth with a subtle sweetness. Ideal for those who want maximum wow with minimal effort.
Preparation Time: 30 minutes (plus chilling) Cooking Time: 10-12 minutes Servings: 24 cookies Estimated Nutrition Info: Per cookie: ~125 calories, 2g protein, 15g carbs, 6g fat
Ingredients
Sugar cookie dough. Royal icing: multiple pastel colors (pink, blue, yellow, purple).
Instructions
- Bake egg-shaped cookies as in classic recipe.
- Outline egg with white stiff icing and flood with a base color (say, light blue).
- Immediately drop small dots of contrasting colors across the wet surface.
- Drag a toothpick or scribe tool through the dots in swirls or zigzags for marbled effect.
- Add a border or name if desired once mostly set. Dry 2 hours.
Why You’ll Love It Wet-on-wet marbling is forgiving and creates unique patterns every time — no two cookies are exactly alike. Perfect for large batches. Use fewer colors for a simpler look or add edible glitter for sparkle.
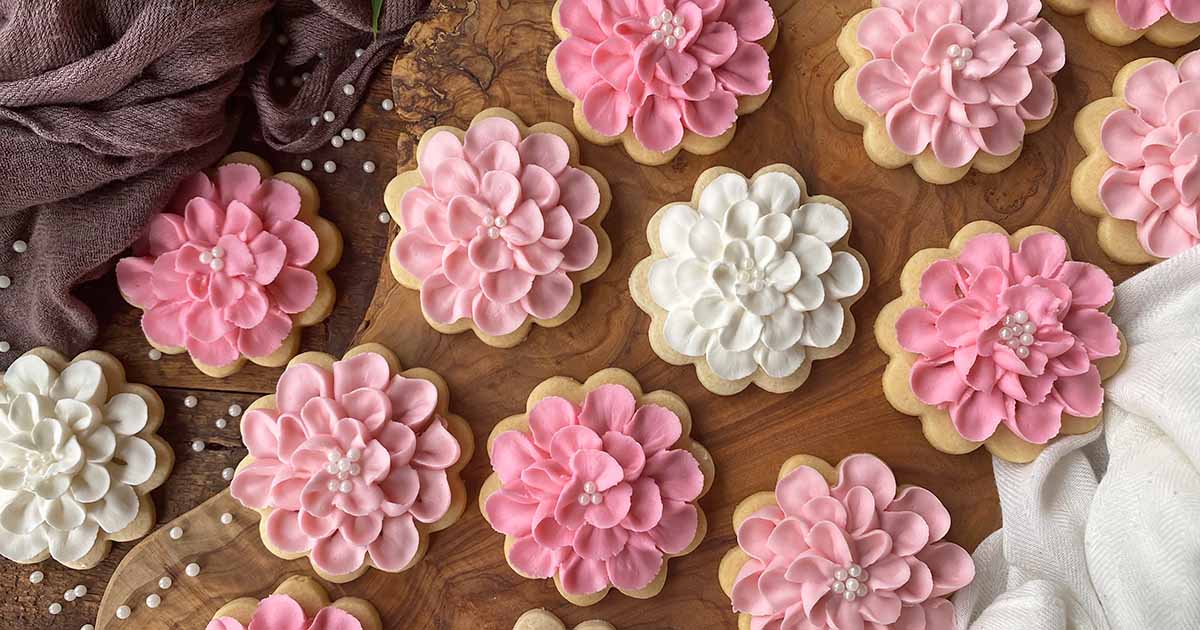
Simple Easter Flower Cookies with Royal Icing
Bright daisy or tulip-shaped cookies burst with color thanks to layered royal icing petals in sunny yellows, pinks, and greens. The centers get a fun sprinkle or dot treatment for texture. These cookies have a tender bite and make lovely centerpieces or favors.
Preparation Time: 40 minutes (plus chilling) Cooking Time: 10-12 minutes Servings: 20-24 cookies Estimated Nutrition Info: Per cookie: ~130 calories, 2g protein, 16g carbs, 6g fat
Ingredients
Sugar cookie base. Royal icing in flower colors; yellow for centers, green for leaves.
Instructions
- Cut flower shapes from chilled dough and bake. Cool.
- Flood entire flower with base petal color. Let set slightly.
- Pipe contrasting petal outlines or details on top.
- Add yellow center dots and green leaf accents.
- Finish with sprinkles while wet on the center. Allow full drying time.
Why You’ll Love It Flower cookies brighten any dessert table and work well for non-Easter spring events too. Simplify by using one color per flower or add a dab of lemon extract to the icing for freshness.
Royal Icing Tips for Easter Cookies
Getting consistent results comes down to a few practical steps. Aim for stiff peak icing (holds a peak when lifted) for outlining and 10-15 second flood consistency for filling large areas. Always cover bowls with a damp cloth to prevent crusting. If your kitchen is humid, add a tiny bit more powdered sugar.
Chill dough thoroughly — 1 hour minimum prevents spreading. Bake until just golden at edges for soft centers. For storage, decorated cookies last 1-2 weeks in an airtight container at room temperature.
Choosing Cookie Cutters and Tools
Basic egg, bunny, and flower cutters are available at most craft stores or online. A $10 set often includes multiple shapes. Use squeeze bottles for flooding to make life easier than piping bags for large areas. Toothpicks work wonders for pulling designs in wet icing.
Common Royal Icing Consistencies Explained
Stiff: For borders and fine details — barely moves when piped. Medium: For writing or small accents. Flood: Flows smoothly and settles flat in 10-15 seconds. Test by drawing a line through it; it should disappear in that time.
Scaling Recipes for Bigger Crowds
Double the dough easily for 48+ cookies. Make icing in batches so it stays fresh. Plan on 1-2 cookies per person for a dessert table, or more if they’re the main treat. Baking in advance and freezing undecorated cookies saves time the week of Easter.
FAQ
Can I make these cookies ahead of time? Yes! Bake the sugar cookies up to 1 month ahead and freeze in airtight bags. Thaw at room temperature before decorating. Fully decorated cookies stay fresh for 7-14 days in a cool, dry spot.
What if I don’t have meringue powder? You can use a simple powdered sugar glaze with milk and corn syrup for softer icing, though it won’t dry as hard or shiny. Adjust liquid for spreadable consistency.
How do I fix runny royal icing? Add more sifted powdered sugar a tablespoon at a time and re-whip. Too thick? Add water ½ teaspoon at a time. Humidity affects this, so test often.
Are there gluten-free or vegan options? Use a 1:1 gluten-free flour blend for the dough (results may vary slightly in spread). For vegan, try aquafaba-based royal icing recipes and plant-based butter. Always check labels.
My icing colors bleed — what went wrong? Usually too much moisture or decorating before the base layer fully dries (wait at least 30-60 minutes between layers). Use gel colors sparingly as they are concentrated.
How should I store decorated cookies for shipping? Layer with parchment or wax paper in a sturdy box. Add bubble wrap around the container. Ship in cool weather or use insulated packaging.
Can kids help with these designs? Absolutely — let them flood eggs or add sprinkles to bunnies. Simpler shapes and wet-on-wet techniques work best for little hands. Supervise fine piping.
What’s the best way to clean up after decorating? Let excess icing dry on parchment scraps, then peel and discard. Soak tools in warm water right away. Royal icing dissolves easily once wet again.
These seven Easter cookies with royal icing designs should give you plenty of options to mix and match for your celebration. Pick one or two that speak to you, gather your supplies, and enjoy the process — the results always taste even better when made with a little love. Save this list for next year, and happy decorating!