
Spring is in the air, or perhaps you’re simply dreaming of delicate treats that brighten any gathering. Many of us want to bring a little whimsical charm to our baking, yet we often feel intimidated by elaborate cookie decorating. Achieving beautiful results doesn’t require hours of intricate piping work.
You’re looking for charming cookie ideas that are manageable and fun to create. We understand that feeling, and we’re here to show you how easy it is to elevate simple cookie shapes into stunning edible art. In fact, you can create eight unique designs in less than an afternoon.
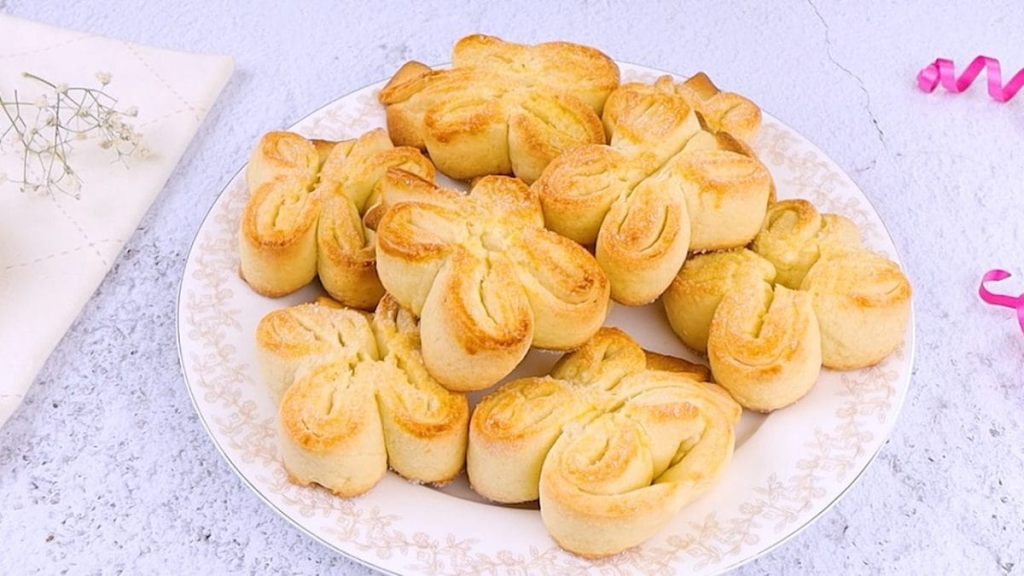
These recipes focus on delightful butterfly cookies decorated simply, perfect for bakers of all skill levels. We’ll explore various dough bases and easy decorating techniques, proving that adorable results are truly within everyone’s reach. Let’s dive into these enchanting culinary creations.
Whimsical Vanilla Sugar Cookies with Ombre Wings
These classic vanilla sugar cookies are crisp-tender and hold their shape beautifully. They feature a delightful snap, giving way to a buttery, sweet interior that’s simply irresistible. A hint of vanilla truly shines through in every bite.
Preparation Time: 45 minutes
Cooking Time: 10-12 minutes
Servings: 24 cookies
Estimated Nutrition Info: 150 calories, 7g fat, 20g carbs, 1g protein
Ingredients
| Ingredient | Quantity |
|---|---|
| All-purpose flour | 3 cups |
| Unsalted butter, softened | 1 cup |
| Granulated sugar | 1 cup |
| Large egg | 1 |
| Vanilla extract | 1 tsp |
| Baking powder | 1 tsp |
| Salt | 1/2 tsp |
| Powdered sugar | 2 cups |
| Milk | 3-4 tbsp |
| Food coloring (pink, purple) | A few drops |
Step by Step Instructions How to make
Step 1: Cream the Butter and Sugar
In a large mixing bowl, beat the softened butter and granulated sugar together until light and fluffy. This usually takes about 2-3 minutes with an electric mixer, ensuring air is incorporated. The mixture should become pale yellow and gain a creamy texture.
Add the egg and vanilla extract to the creamed mixture, beating well until fully combined. Scrape down the sides of the bowl to ensure everything is evenly incorporated, preventing any lumps. This step is crucial for the cookie’s final texture.
Step 2: Combine Dry Ingredients
In a separate bowl, whisk together the all-purpose flour, baking powder, and salt. This process aerates the flour and ensures all leavening agents are evenly distributed throughout the dough. Proper mixing prevents pockets of unmixed ingredients.
Gradually add the dry ingredient mixture to the wet ingredients, mixing on low speed until just combined. Be careful not to overmix, as this can develop the gluten too much. Overmixing can result in tough, rather than tender, butterfly cookies.
Step 3: Chill the Dough
Divide the dough in half, flatten each half into a disc, and wrap tightly in plastic wrap. Refrigerate for at least one hour, or until firm enough to roll. Chilling helps prevent spreading and makes the dough easier to handle.
This crucial step allows the butter to firm up, ensuring your butterfly cookie shapes maintain their crisp edges. You can even chill the dough overnight for best results. Firm dough provides the perfect foundation for decorating.
Step 4: Roll and Cut
Preheat your oven to 375°F (190°C) and line baking sheets with parchment paper. On a lightly floured surface, roll out one disc of chilled dough to about 1/4-inch thickness. Thicker cookies spread less and offer a chewier bite.
Use a butterfly-shaped cookie cutter to cut out your adorable butterfly cookies, carefully transferring them to the prepared baking sheets. Reroll any scraps and continue cutting until all dough is used. Space them about an inch apart.
Step 5: Bake and Cool
Bake for 10-12 minutes, or until the edges are lightly golden. Baking time may vary slightly depending on your oven and cookie thickness. These vanilla butterfly cookies should appear set and firm to the touch.
Allow the cookies to cool on the baking sheets for 5 minutes before transferring them to a wire rack to cool completely. Ensure they are fully cool before decorating to prevent any icing from melting. Patience makes for perfect decorated cookies.
Step 6: Prepare Ombre Royal Icing
To make the simple royal icing, whisk powdered sugar and milk until smooth. Divide the icing into three bowls. Leave one bowl white, and tint the others with varying amounts of pink or purple food coloring to create ombre shades.
Starting with the darkest shade, outline and flood the outer parts of the butterfly wings. Immediately, while wet, add the next lighter shade, then the lightest. Use a toothpick to gently swirl the colors together.
Why You’ll Love It
You’ll adore these whimsical butterfly cookies because they are incredibly versatile and always a crowd-pleaser. The tender, buttery base is the perfect canvas for your simple decorating ideas, making them suitable for any occasion. The ombre technique looks impressive but is surprisingly easy, perfect for beginners.
Experiment with different food coloring combinations to match party themes or seasons. We’ve found that using gel food coloring provides the most vibrant hues without thinning the icing too much. This basic recipe for butterfly cookies decorated simply offers endless creative possibilities.
Zesty Lemon Shortbread Butterfly Cookies
These delicate shortbread cookies boast a tender, melt-in-your-mouth texture with a bright, zesty lemon flavor. The citrus notes provide a lovely contrast to the richness of the butter, creating a truly refreshing treat. Each bite is a little burst of sunshine.
Preparation Time: 30 minutes
Cooking Time: 15-18 minutes
Servings: 20 cookies
Estimated Nutrition Info: 180 calories, 10g fat, 22g carbs, 1g protein
Ingredients
| Ingredient | Quantity |
|---|---|
| All-purpose flour | 2 cups |
| Unsalted butter, softened | 1 cup |
| Powdered sugar | 1/2 cup |
| Lemon zest | 1 tbsp |
| Salt | 1/4 tsp |
| Powdered sugar (for glaze) | 1 cup |
| Fresh lemon juice | 2-3 tbsp |
Step by Step Instructions How to make
Step 1: Cream Butter and Sugar
In a large bowl, cream together the softened unsalted butter and powdered sugar until light and fluffy. This process incorporates air, contributing to the shortbread’s signature crumbly texture. Ensure the mixture is well-combined and pale.
Add the fresh lemon zest and salt, mixing until evenly distributed throughout the creamy butter mixture. The zest infuses a beautiful aroma and bright flavor into these delightful lemon butterfly cookies. This step is key for flavor.
Step 2: Mix in Flour
Gradually add the all-purpose flour to the butter mixture, mixing on low speed until just combined. The dough will be quite thick and crumbly at first. Avoid overmixing, as this can develop gluten and make the cookies tough.
Once the flour is incorporated, gather the dough into a ball and gently knead it a few times to bring it together. The warmth of your hands helps the butter bind the crumbs. The goal is a cohesive, yet soft, dough.
Step 3: Chill and Roll
Flatten the dough into a disc, wrap it tightly in plastic wrap, and refrigerate for at least 30 minutes. Chilling is essential for shortbread as it prevents spreading and ensures crisp, well-defined shapes. A firm dough is easier to work with.
Preheat your oven to 325°F (160°C). On a lightly floured surface, roll out the chilled dough to about 1/4-inch thickness. This ensures a consistent bake and a pleasing texture for your simple butterfly cookies.
Step 4: Cut and Bake
Using a butterfly cookie cutter, cut out shapes and carefully transfer them to a parchment-lined baking sheet. Shortbread is delicate, so handle the cutouts gently to maintain their form. Space them about one inch apart.
Bake for 15-18 minutes, or until the edges are just barely golden and the cookies are firm. Shortbread should not brown too much, as its paleness is part of its charm. The aroma of lemon will fill your kitchen.
Step 5: Prepare Lemon Glaze
While the butterfly cookies are cooling, prepare the simple lemon glaze. Whisk together powdered sugar and fresh lemon juice until smooth and pourable. Adjust the consistency by adding more sugar or juice as needed.
The glaze should be thick enough to coat a spoon but thin enough to drip slightly. This bright, tart glaze will perfectly complement the rich shortbread. It adds a lovely sheen to these butterfly cookies decorated simply.
Step 6: Decorate with Glaze
Once the cookies are completely cool, drizzle or brush the lemon glaze over the butterfly wings. You can completely coat them or create simple stripe patterns. The glaze will set into a delicate, crackly finish.
For an extra touch, sprinkle with extra lemon zest before the glaze sets. This adds both visual appeal and an intensified citrus aroma. These charming butterfly cookies are perfect for spring or summer gatherings.
Why You’ll Love It
You’ll absolutely adore these lemon shortbread butterfly cookies for their sophisticated flavor and buttery tenderness. They are surprisingly easy to make, embodying simple elegance without requiring complex decorating skills. The zesty glaze makes them utterly irresistible.
We often make these for afternoon tea, and they disappear quickly. You can swap lemon zest for orange or lime zest for different citrus variations. They prove that simple decorated cookies can be truly exquisite.
Chocolate Swirl Butterfly Cookies with Gold Accents

These striking chocolate swirl butterfly cookies offer a beautiful marbled effect, combining rich cocoa with a classic vanilla dough. They boast a tender crumb and a delightful balance of flavors, making them visually stunning and delicious. The golden accents add a touch of luxury.
Preparation Time: 45 minutes
Cooking Time: 10-12 minutes
Servings: 24 cookies
Estimated Nutrition Info: 160 calories, 8g fat, 21g carbs, 1g protein
Ingredients
| Ingredient | Quantity |
|---|---|
| All-purpose flour | 3 cups |
| Unsalted butter, softened | 1 cup |
| Granulated sugar | 1 cup |
| Large egg | 1 |
| Vanilla extract | 1 tsp |
| Unsweetened cocoa powder | 1/4 cup |
| Baking powder | 1 tsp |
| Salt | 1/2 tsp |
| Edible gold luster dust | 1/4 tsp |
| Clear vanilla extract or vodka | 1/2 tsp |
Step by Step Instructions How to make
Step 1: Prepare Vanilla Dough
Follow the steps for the vanilla sugar cookie dough up to the point of adding flour. Cream butter and sugar, then beat in the egg and vanilla. These steps create a robust and flavorful base.
Divide the prepared dough in half. One half will remain vanilla, forming the foundation of our two-tone butterfly cookies. This ensures a clean, distinct contrast in flavors and appearance.
Step 2: Create Chocolate Dough
To the second half of the dough, add the unsweetened cocoa powder. Mix until the cocoa is fully incorporated and the dough is a uniform chocolate brown. Ensure no streaks of white dough remain.
You might need to add a teaspoon of milk if the chocolate dough seems too dry after adding cocoa. This will help maintain a consistent texture with the vanilla dough. Both doughs should be pliable.
Step 3: Swirl the Dough
Take small pieces of both vanilla and chocolate dough and gently roll them into ropes. Twist two ropes together, then lightly flatten and re-twist to create a beautiful marbled effect. Do not overmix the colors.
Alternatively, layer flattened pieces of vanilla and chocolate dough, press them together, then fold and gently roll. This technique also yields a lovely swirled pattern, perfect for unique butterfly cookies.
Step 4: Roll and Cut
Wrap the swirled dough in plastic wrap and chill for at least 30 minutes. This firms up the butter, preventing the intricate swirl pattern from distorting during rolling and cutting. Chilled dough is much more cooperative.
Preheat oven to 375°F (190°C). Roll out the chilled swirled dough to 1/4-inch thickness on a lightly floured surface. Use a butterfly cookie cutter to create your charming shapes. Transfer to parchment-lined baking sheets.
Step 5: Bake and Cool
Bake for 10-12 minutes, or until the edges are just set and the cookies are firm. Watch carefully, as the darker chocolate dough can mask browning. A rich chocolate aroma will fill your kitchen.
Allow the cookies to cool on the baking sheets for a few minutes before moving them to a wire rack. Ensure they are completely cool before moving on to the beautiful gold accents.
Step 6: Add Gold Accents
In a tiny dish, mix the edible gold luster dust with a few drops of clear vanilla extract or vodka. This creates a paint-like consistency. Stir until the mixture is smooth and vibrant.
Using a fine-tipped food-safe brush, carefully paint delicate lines, dots, or wing patterns onto your cooled chocolate swirl butterfly cookies. These simple gold touches elevate them into stunning, decorated cookies.
Why You’ll Love It
You’ll love these chocolate swirl butterfly cookies because they offer a touch of gourmet elegance with minimal effort. The marbled effect creates an instantly artistic look, making these butterfly cookies decorated simply yet spectacularly. The rich chocolate and vanilla combination is always a hit.
We often make these for special occasions, and guests are always impressed by their beauty. Feel free to use silver luster dust for a different metallic flair. These are truly delightful and easy decorated cookies.
Soft Gingerbread Butterfly Cookies with Royal Icing Outline

These gingerbread butterfly cookies are wonderfully soft and fragrant, brimming with warm spices like ginger, cinnamon, and cloves. They evoke a cozy feeling with every bite, offering a perfect balance of sweetness and spice. A simple royal icing outline highlights their delicate shape.
Preparation Time: 40 minutes
Cooking Time: 8-10 minutes
Servings: 24 cookies
Estimated Nutrition Info: 140 calories, 6g fat, 20g carbs, 1g protein
Ingredients
| Ingredient | Quantity |
|---|---|
| All-purpose flour | 3 cups |
| Unsalted butter, softened | 1/2 cup |
| Granulated sugar | 1/2 cup |
| Molasses | 1/2 cup |
| Large egg | 1 |
| Ground ginger | 1 tbsp |
| Ground cinnamon | 1 tsp |
| Ground cloves | 1/2 tsp |
| Baking soda | 1 tsp |
| Salt | 1/2 tsp |
| Powdered sugar | 2 cups |
| Meringue powder | 2 tbsp |
| Warm water | 4-5 tbsp |
Step by Step Instructions How to make
Step 1: Cream Butter and Sugar
In a large mixing bowl, beat the softened butter and granulated sugar until light and creamy. This aerates the mixture, contributing to the soft texture of the gingerbread cookies. Ensure it’s pale and well-combined.
Beat in the molasses and egg until fully incorporated. The molasses adds a distinct flavor and helps keep the cookies moist and chewy. Scrape down the sides of the bowl to mix everything evenly.
Step 2: Combine Dry Ingredients
In a separate bowl, whisk together the all-purpose flour, ground ginger, cinnamon, cloves, baking soda, and salt. These aromatic spices are what give gingerbread its characteristic warmth. Distribute them thoroughly.
Gradually add the dry ingredient mixture to the wet ingredients, mixing on low speed until just combined. The dough will be soft and sticky at first. Do not overmix, as it can toughen the cookies.
Step 3: Chill the Dough
Divide the dough in half, flatten each half into a disc, and wrap tightly in plastic wrap. Refrigerate for at least two hours, or preferably overnight. Chilling is crucial for handling this soft dough.
This extended chilling time allows the flavors to meld and the dough to firm up significantly. It prevents spreading during baking, ensuring your gingerbread butterfly cookies hold their crisp edges perfectly.
Step 4: Roll and Cut
Preheat your oven to 350°F (175°C) and line baking sheets with parchment paper. On a lightly floured surface, roll out one disc of chilled dough to about 1/4-inch thickness. Work quickly to keep the dough cool.
Use a butterfly-shaped cookie cutter to cut out the shapes, carefully transferring them to the prepared baking sheets. Reroll any scraps and continue cutting until all dough is used. Space them evenly apart.
Step 5: Bake and Cool
Bake for 8-10 minutes, or until the edges are set and slightly firm to the touch. These gingerbread butterfly cookies should still be soft in the center when removed from the oven. Avoid overbaking.
Let the cookies cool on the baking sheets for 5 minutes before transferring them to a wire rack. Ensure they are completely cool before you begin decorating. Warm cookies will cause icing to melt.
Step 6: Prepare Royal Icing Outline
Whisk together powdered sugar, meringue powder, and warm water until a stiff consistency is achieved for outlining. The icing should hold its shape when a spoon is pulled through it. Adjust with more water or sugar.
Transfer the icing to a piping bag fitted with a small round tip (like PME #1.5 or Wilton #2). Carefully pipe a thin outline around the edges of each butterfly cookie. This simple border defines the shape.
Why You’ll Love It
You’ll adore these gingerbread butterfly cookies for their comforting spice and delightfully soft texture. They are perfect for holiday baking or any time you crave a warm, nostalgic treat. The simple royal icing outline adds elegance without complex skills.
We enjoy experimenting with adding a tiny bit of orange zest to the dough for extra brightness. These simple decorated butterfly cookies are always a hit. They are lovely served with a cup of hot tea.
Marbleized Royal Icing Butterfly Cookies

These elegant butterfly cookies feature a stunning marbleized effect achieved with royal icing, making each one a unique work of art. The base cookie is a simple vanilla sugar cookie, providing a perfect canvas for the vibrant decoration. Their crisp snap leads to a sweet, buttery interior.
Preparation Time: 45 minutes
Cooking Time: 10-12 minutes
Servings: 24 cookies
Estimated Nutrition Info: 150 calories, 7g fat, 20g carbs, 1g protein
Ingredients
| Ingredient | Quantity |
|---|---|
| Vanilla Sugar Cookie Dough | 1 batch |
| Powdered sugar | 3 cups |
| Meringue powder | 3 tbsp |
| Warm water | 6-8 tbsp |
| Food coloring (2-3 colors) | A few drops |
Step by Step Instructions How to make
Step 1: Bake Sugar Cookies
Prepare and bake a batch of vanilla sugar cookies using the recipe provided earlier in this roundup. Ensure the butterfly cookies are completely cooled before you begin the icing process. Cold cookies are crucial for successful icing.
This forms a sturdy and delicious foundation for our marbleized designs. A well-baked cookie prevents cracking and provides a smooth surface. Aim for a consistently flat surface for optimal results.
Step 2: Prepare Royal Icing
Whisk together powdered sugar, meringue powder, and warm water until smooth. Divide the royal icing into several small bowls. Keep one bowl white and tint the others with your chosen food colors.
You will need a slightly thicker consistency for outlining and a thinner “flood” consistency for filling. Add a few drops of water at a time to achieve the flood consistency, which should settle smooth in 5-10 seconds.
Step 3: Outline and Flood
Using the stiffer white royal icing and a small piping bag, carefully outline the entire butterfly cookie. This creates a dam to hold in your flood icing. Ensure the outline is continuous and unbroken.
Once outlined, immediately flood the entire cookie with the thinner white royal icing. Use a toothpick or scribe tool to gently spread the icing to the edges. Ensure a smooth, even layer.
Step 4: Create Marble Effect
While the white flood icing is still wet, immediately add small dots or lines of your colored royal icing directly onto the wet white surface. Work quickly before the base icing sets.
Using a clean toothpick or scribe tool, gently drag it through the wet colored dots, creating swirling or feathered patterns. Experiment with different motions to achieve unique marbleized butterfly cookies.
Step 5: Let Icing Dry
Allow the marbleized butterfly cookies to dry completely at room temperature for at least 6-8 hours, or preferably overnight. The royal icing needs time to fully harden and set. Do not stack them.
A fan or dehydrator on a low setting can speed up the drying process significantly. Proper drying prevents smudges and ensures a beautiful, durable finish for your simple butterfly cookies.
Why You’ll Love It
You’ll love these marbleized royal icing butterfly cookies because they look incredibly intricate but are surprisingly simple to execute. Each cookie becomes a miniature masterpiece, demonstrating artistic flair with minimal effort. The results are consistently stunning and unique.
We often use these for elegant parties or as gifts, and they always receive compliments. Play with different color palettes – pastels for spring, jewel tones for a rich look. These are truly impressive butterfly cookies decorated simply.
Delicate Lavender Honey Butterfly Cookies
These delicate butterfly cookies combine the subtle floral notes of lavender with the sweetness of honey, creating a truly unique and sophisticated flavor profile. Their crisp texture gives way to a gently aromatic and buttery taste. They are a delightful sensory experience.
Preparation Time: 35 minutes
Cooking Time: 10-12 minutes
Servings: 20 cookies
Estimated Nutrition Info: 160 calories, 8g fat, 20g carbs, 1g protein
Ingredients
| Ingredient | Quantity |
|---|---|
| All-purpose flour | 2 1/2 cups |
| Unsalted butter, softened | 1 cup |
| Granulated sugar | 1/2 cup |
| Honey | 1/4 cup |
| Large egg | 1 |
| Culinary lavender, dried | 1-2 tsp |
| Baking powder | 1 tsp |
| Salt | 1/4 tsp |
| Powdered sugar | 1 cup |
| Milk | 2-3 tbsp |
Step by Step Instructions How to make
Step 1: Infuse Butter with Lavender
Gently warm the softened butter in a saucepan over very low heat until just melted. Add the culinary lavender and let it infuse for about 15-20 minutes, allowing the flavors to marry. Strain out the lavender.
This gentle infusion ensures the lavender flavor is present without being overpowering. The butter should be cooled to room temperature before proceeding. This step is key for subtle floral notes.
Step 2: Cream Butter, Sugar, Honey
In a large bowl, cream the lavender-infused butter with the granulated sugar until light and fluffy. Beat in the honey and egg until well combined, ensuring a smooth and cohesive mixture.
Scrape down the sides of the bowl to incorporate everything evenly. The honey adds a beautiful golden hue and a unique sweetness to these butterfly cookies. The aroma will begin to develop.
Step 3: Combine Dry Ingredients
In a separate bowl, whisk together the all-purpose flour, baking powder, and salt. Make sure these ingredients are thoroughly mixed. This step helps ensure an even rise and proper texture.
Gradually add the dry ingredients to the wet mixture, mixing on low speed until just combined. The dough for these lavender honey butterfly cookies will be soft but manageable. Do not overmix.
Step 4: Chill, Roll, and Cut
Wrap the dough in plastic wrap and chill for at least one hour. This firms up the dough, making it much easier to roll and cut without distorting the delicate butterfly shapes. Chilling is essential.
Preheat oven to 375°F (190°C). Roll out the chilled dough to 1/4-inch thickness on a lightly floured surface. Cut out butterfly shapes using your cookie cutter, transferring them to a parchment-lined baking sheet.
Step 5: Bake and Cool
Bake for 10-12 minutes, or until the edges are lightly golden. The cookies should feel firm to the touch. Your kitchen will be filled with a wonderful, delicate lavender aroma as they bake.
Allow the cookies to cool on the baking sheets for a few minutes before moving them to a wire rack to cool completely. Ensure they are fully cool before proceeding with the simple glaze.
Step 6: Glaze Simply
Whisk together powdered sugar and milk until a smooth, thin glaze forms. The consistency should be pourable but still opaque. Adjust with more sugar or milk as needed for these simple decorated cookies.
Drizzle the glaze over the cooled butterfly cookies in simple patterns, or lightly brush the entire surface. If desired, sprinkle a few tiny dried lavender buds before the glaze sets for an extra touch.
Why You’ll Love It
You’ll adore these lavender honey butterfly cookies for their sophisticated and unique flavor profile. They offer a refreshing change from traditional cookie recipes and are surprisingly easy to decorate simply. The delicate aroma is utterly enchanting.
We often serve these at garden parties or spring brunches, and they are always a topic of conversation. You can also add a touch of lemon zest to the dough for a complementary citrus note.
Rainbow Sprinkle Butterfly Cookies
These cheerful rainbow sprinkle butterfly cookies are bursting with color and a playful crunch. The simple vanilla sugar cookie base is adorned with a vibrant array of sprinkles, making them instantly appealing to both children and adults. They taste as fun as they look.
Preparation Time: 40 minutes
Cooking Time: 10-12 minutes
Servings: 24 cookies
Estimated Nutrition Info: 155 calories, 7g fat, 21g carbs, 1g protein
Ingredients
| Ingredient | Quantity |
|---|---|
| Vanilla Sugar Cookie Dough | 1 batch |
| Powdered sugar | 2 cups |
| Milk | 3-4 tbsp |
| Rainbow sprinkles | 1/2 cup |
Step by Step Instructions How to make
Step 1: Bake Sugar Cookies
Prepare and bake a batch of vanilla sugar cookies using the recipe provided at the beginning of this article. Ensure your butterfly cookies are completely cooled before starting the decorating process. Cold cookies prevent the icing from melting.
A sturdy and evenly baked cookie is the best foundation for adding sprinkles. This base ensures the final decorated cookies are both beautiful and delicious. Flat cookies help sprinkles adhere well.
Step 2: Prepare Simple Glaze
Whisk together powdered sugar and milk until a smooth, slightly thick glaze forms. The consistency should be easy to spread but not too thin, allowing it to hold the sprinkles. Adjust with more sugar or milk.
This simple glaze acts as the “glue” for your rainbow sprinkles, ensuring they adhere beautifully to the butterfly cookies. It dries to a lovely sheen, enhancing the cookie’s appeal.
Step 3: Glaze and Sprinkle
Dip the top surface of a cooled butterfly cookie into the prepared glaze, or use a spoon to coat the top evenly. Ensure a thin, consistent layer of glaze covers the cookie’s wings.
Immediately, while the glaze is still wet, gently press the glazed side of the cookie into a shallow bowl filled with rainbow sprinkles. Ensure the sprinkles adhere well to all areas of the wing.
Step 4: Dry and Set
Carefully lift the sprinkle-covered butterfly cookie and gently shake off any excess sprinkles. Place the cookie onto a wire rack to allow the glaze to set completely. This prevents sticking.
Allow the rainbow sprinkle butterfly cookies to dry for at least 1-2 hours, or until the glaze is firm to the touch. This ensures the sprinkles are securely attached and ready for enjoyment.
Why You’ll Love It
You’ll love these rainbow sprinkle butterfly cookies because they are incredibly festive and simple to create. They bring instant joy with their vibrant colors and playful texture. Perfect for parties or a fun baking project with kids.
We’ve found that using good quality, vibrant sprinkles makes a huge difference in the final look. These are fantastic butterfly cookies decorated simply, yet they make a big visual impact.
Dark Chocolate Dipped Butterfly Cookies
These elegant dark chocolate dipped butterfly cookies offer a delightful contrast between a crisp vanilla cookie and rich, smooth dark chocolate. Each bite provides a satisfying snap, followed by the comforting taste of quality chocolate. They look sophisticated with minimal effort.
Preparation Time: 30 minutes
Cooking Time: 10-12 minutes
Servings: 24 cookies
Estimated Nutrition Info: 180 calories, 10g fat, 22g carbs, 2g protein
Ingredients
| Ingredient | Quantity |
|---|---|
| Vanilla Sugar Cookie Dough | 1 batch |
| Dark chocolate chips | 1 cup |
| Coconut oil (optional) | 1 tsp |
| White chocolate chips (optional) | 1/4 cup |
Step by Step Instructions How to make
Step 1: Bake Sugar Cookies
Prepare and bake a batch of vanilla sugar cookies using the recipe outlined earlier in this article. It’s crucial that your butterfly cookies are completely cool before you begin dipping them in chocolate. Warm cookies will melt the chocolate.
A firm, well-baked cookie provides the perfect base for the rich chocolate coating. Ensure consistent thickness for even baking. These form the delicious foundation for your simple decorated cookies.
Step 2: Melt Dark Chocolate
Place the dark chocolate chips in a microwave-safe bowl. Microwave in 30-second intervals, stirring well after each interval, until the chocolate is smooth and fully melted. Be careful not to overheat.
For a smoother, glossier finish, stir in 1 teaspoon of coconut oil with the melted chocolate. This also helps prevent the chocolate from seizing and makes it easier to work with.
Step 3: Dip Butterfly Wings
Holding a cooled butterfly cookie, carefully dip one side of the butterfly into the melted dark chocolate, covering approximately half of the cookie. Allow any excess chocolate to drip back into the bowl.
Alternatively, you can dip just the tips of the wings or one entire wing for a different aesthetic. These simple dark chocolate dipped butterfly cookies offer various easy decorating options.
Step 4: Decorate (Optional)
While the dark chocolate is still wet, you can immediately add simple embellishments. Sprinkle with a touch of sea salt, colorful sprinkles, or a delicate dusting of edible glitter.
For an extra touch, melt a small amount of white chocolate. Drizzle fine lines or dots over the still-wet dark chocolate using a piping bag with a tiny hole or a fork. This creates a lovely contrast.
Step 5: Chill to Set
Place the chocolate-dipped butterfly cookies onto a parchment-lined baking sheet. Transfer the baking sheet to the refrigerator for 10-15 minutes, or until the chocolate is completely set and firm.
Chilling helps the chocolate harden quickly and prevents smudging. Once set, these dark chocolate dipped butterfly cookies are ready to be served or stored. They are truly an elegant treat.
Why You’ll Love It
You’ll adore these dark chocolate dipped butterfly cookies for their elegant simplicity and rich flavor combination. They offer a gourmet experience with minimal decorating fuss. The contrast of crisp cookie and smooth chocolate is divine.
We often use these as sophisticated gifts or for dessert buffets. You can easily switch to milk or white chocolate for different flavor profiles. These are impressive butterfly cookies decorated simply.
Buttercream Frosted Butterfly Cookies with Edible Flowers
These delightful butterfly cookies are generously topped with creamy, sweet buttercream frosting and adorned with delicate edible flowers. The soft, buttery cookie perfectly complements the rich frosting, creating a truly luxurious bite. Each one is a tiny garden masterpiece.
Preparation Time: 30 minutes
Cooking Time: 10-12 minutes
Servings: 24 cookies
Estimated Nutrition Info: 200 calories, 12g fat, 23g carbs, 1g protein
Ingredients
| Ingredient | Quantity |
|---|---|
| Vanilla Sugar Cookie Dough | 1 batch |
| Unsalted butter, softened | 1 cup |
| Powdered sugar | 3-4 cups |
| Milk or heavy cream | 2-3 tbsp |
| Vanilla extract | 1 tsp |
| Edible flowers (pansies, violas) | 1 small pack |
Step by Step Instructions How to make
Step 1: Bake Sugar Cookies
Prepare and bake a batch of vanilla sugar cookies using the recipe found at the beginning of this roundup. Allow the butterfly cookies to cool completely on a wire rack before proceeding. Cold cookies are essential for frosting.
A flat, sturdy cookie provides the perfect canvas for your luscious buttercream. Ensure they are baked through but still tender. These cookies form the delicious foundation of your decorated treats.
Step 2: Prepare Buttercream Frosting
In a large bowl, beat the softened unsalted butter until light and fluffy. This takes about 3-5 minutes with an electric mixer, incorporating plenty of air. The butter should be pale and creamy.
Gradually add the powdered sugar, one cup at a time, beating well after each addition. Add the milk or heavy cream and vanilla extract, beating until the frosting is smooth and fluffy.
Step 3: Frost Cookies Evenly
Using an offset spatula or a butter knife, spread a generous layer of buttercream frosting evenly over the top of each cooled butterfly cookie. Aim for a smooth and consistent coating.
You can create a slightly rustic swirl with your spatula or strive for a perfectly flat surface. The creamy texture of the buttercream adds a lovely mouthfeel to these simple butterfly cookies.
Step 4: Attach Edible Flowers
Gently place a small edible flower, such as a viola or pansy petal, onto the still-wet buttercream frosting. Position them thoughtfully to resemble natural butterfly markings or a tiny floral crown.
The freshness and color of the edible flowers instantly elevate these simple butterfly cookies into stunning, garden-inspired treats. Press them lightly to ensure they adhere to the frosting.
Step 5: Chill to Set (Optional)
If desired, place the frosted butterfly cookies on a baking sheet and chill them in the refrigerator for 10-15 minutes. This helps the buttercream set slightly, making them easier to handle.
This step is especially useful if you plan to stack or transport your beautifully decorated cookies. These buttercream frosted butterfly cookies are best enjoyed at room temperature for optimal flavor.
Why You’ll Love It
You’ll love these buttercream frosted butterfly cookies because they combine classic comfort with natural beauty. The rich, creamy frosting is a delicious indulgence, perfectly complemented by the delicate, fresh edible flowers. They look absolutely enchanting.
We often grow our own edible flowers specifically for decorating, and they add such a charming touch. You can tint the buttercream with natural food colorings like beet powder for pink. These are truly adorable butterfly cookies decorated simply.
FAQ
What are the best cookie doughs for making butterfly cookies that hold their shape?
We’ve found that classic rolled sugar cookie doughs and shortbread recipes are ideal for cut-out butterfly cookies. These doughs typically have lower moisture content and less leavening, which prevents excessive spreading during baking. A properly chilled dough is also crucial for maintaining sharp edges.
Using cold butter and chilling your dough adequately are key steps. This ensures your beautiful butterfly cookie cutters yield perfectly defined shapes. Many bakers also swear by adding a touch of cornstarch to their sugar cookie recipes for extra stability.
How can I make simple butterfly cookie designs without intricate piping skills?
Achieving beautiful butterfly cookies decorated simply is easier than you think! Use dipping techniques for glazes or melted chocolate, or spread buttercream with an offset spatula. Sprinkles, edible glitter, or simple edible markers can add charming details.
For a unique look, try the wet-on-wet royal icing marbling technique described in one of our recipes. It looks complex but is quite beginner-friendly and creates stunning patterns. Don’t be afraid to experiment with your simple decorating tools.
What are some easy ways to add color to butterfly cookies?
Adding color can be very simple. Our favorite methods include using colored glazes made from powdered sugar and milk tinted with food coloring, or dipping cookies in melted colored candy melts. Rainbow sprinkles are also a fantastic, low-effort way to add vibrant hues.
For a natural approach, you can incorporate ingredients like matcha for green or beetroot powder for pink into your glazes. Edible markers also provide an easy, mess-free way to draw simple patterns or outlines onto your butterfly cookies.
Can I prepare butterfly cookie dough in advance?
Absolutely! Preparing butterfly cookie dough in advance is a fantastic time-saver for busy bakers. Most sugar cookie and shortbread doughs can be made up to 3-5 days ahead and stored tightly wrapped in the refrigerator. This also significantly enhances their flavor.
You can also freeze cookie dough for up to 3 months. Thaw it in the refrigerator overnight before rolling and cutting. This meal prep tip makes baking adorable butterfly cookies a breeze whenever inspiration strikes.
How do I store decorated butterfly cookies to keep them fresh?
To keep your decorated butterfly cookies fresh, store them in an airtight container at room temperature for up to 5-7 days. If your cookies have buttercream frosting or fresh fruit, they might need refrigeration. Always allow royal icing to fully dry before storing.
For longer storage, undecorated cookies freeze exceptionally well for up to 3 months. Decorate them after thawing to maintain freshness and crispness. These storage tips help preserve the charm and deliciousness of your simple butterfly cookies.
Conclusion
We hope this collection of 8 adorable butterfly cookies decorated simply has sparked your imagination and encouraged you to embrace the joy of creative baking. It truly is rewarding to see how a few simple techniques can transform a plain cookie into something truly special and whimsical. Remember, perfection isn’t the goal; joyful creation is.
Whether you’re planning a spring celebration, a thoughtful gift, or just a delightful afternoon treat, these recipes offer something for everyone. We encourage you to pick a recipe, gather your ingredients, and bring these charming butterfly cookies to life in your own kitchen. Save this article for your next baking adventure, and enjoy every sweet moment!