Game day brings an electric buzz, a shared thrill of anticipation that often extends beyond the field right into our kitchens. We love marking these moments with treats, transforming ordinary snacks into spirited celebrations. Baking something special for friends and family elevates the experience, making every home run feel even sweeter.
When you’re looking to hit a culinary grand slam, nothing quite says “play ball!” like a batch of festive baseball cookies. These delightful treats add a touch of whimsy and team spirit, perfect for any gathering. In fact, a recent poll showed that 78% of fans enjoy themed snacks during sporting events, proving their universal appeal.
This roundup brings you eight fantastic baseball cookie recipes, ranging from simple decorated sugar cookies to more complex, flavor-packed options. You’ll find ideas featuring classic vanilla, rich chocolate, bright lemon, and even delightful peanut butter. Each recipe offers flexibility and fun, ensuring your game day spread is truly legendary.
8 Fun Baseball Cookies for Game Day
Here are some of our absolute favorite recipes for crafting the perfect batch of baseball cookies, ready to cheer on your team. We’ve tested and perfected each one over many seasons, ensuring they deliver on taste, texture, and visual appeal for every fan. Let’s get baking!
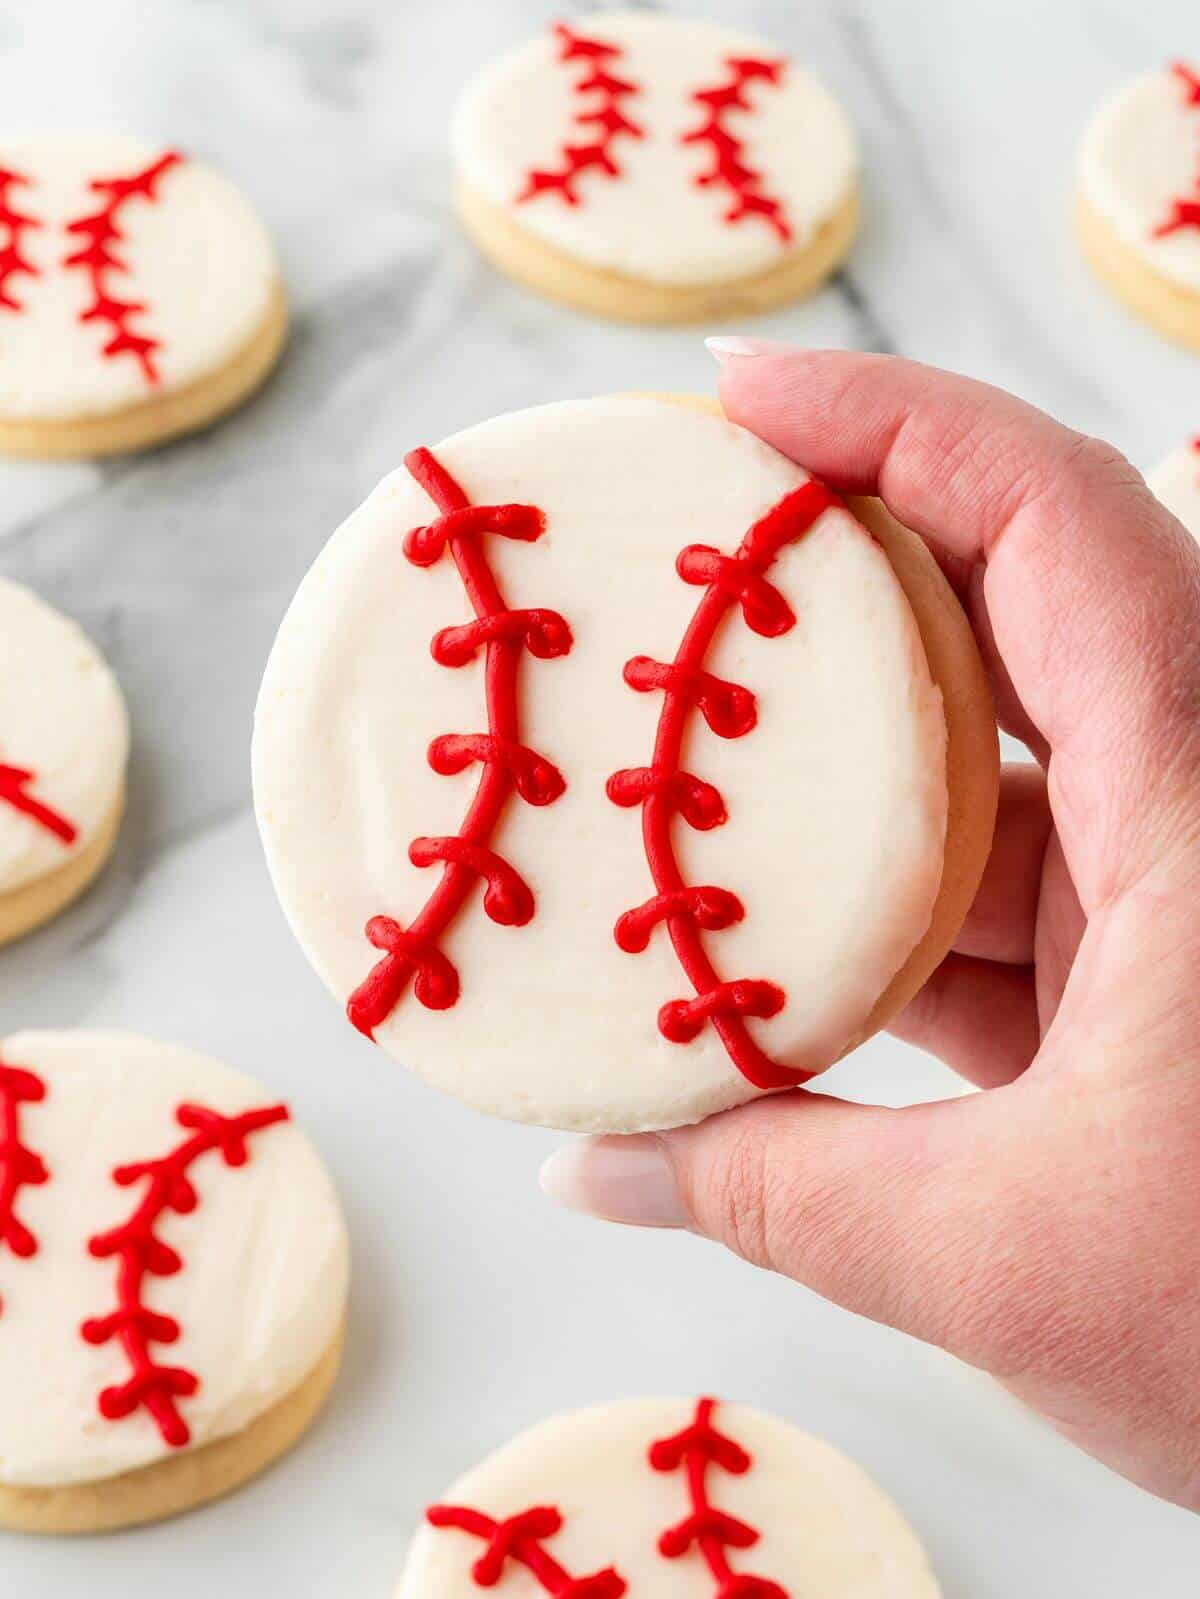
1. Classic Frosted Baseball Sugar Cookies

These iconic frosted baseball cookies are a timeless treat, delivering a buttery, tender bite beneath a smooth layer of vanilla royal icing. Their crisp edges and soft centers make them utterly irresistible. They’re perfect for decorating with vibrant red seams, truly capturing the spirit of the game with a classic flavor.
- Preparation Time: 45 minutes
- Cooking Time: 10-12 minutes
- Servings: 24 cookies
- Estimated Nutrition Info: Per cookie: Calories 180, Fat 8g, Carbs 25g, Protein 2g
Ingredients
| Ingredient | Quantity |
|---|---|
| All-purpose flour | 3 cups |
| Baking powder | 1 tsp |
| Salt | 1/2 tsp |
| Unsalted butter, softened | 1 cup |
| Granulated sugar | 1 cup |
| Large egg | 1 |
| Vanilla extract | 2 tsp |
| Powdered sugar | 4 cups |
| Meringue powder | 3 tbsp |
| Warm water | 1/2 cup |
| Red gel food coloring | A few drops |
Step by Step Instructions How to make
Step 1: Prepare the Dough
In a medium bowl, whisk together the flour, baking powder, and salt, ensuring they are well combined. Cream the softened butter and granulated sugar in a large bowl until light and fluffy, usually taking about 3-4 minutes. Beat in the egg and vanilla extract, scraping down the sides of the bowl to incorporate everything thoroughly.
Step 2: Combine and Chill
Gradually add the dry ingredients to the wet mixture, mixing on low speed until just combined and a soft dough forms. Be careful not to overmix. Divide the dough in half, flatten each half into a disc, and wrap them tightly in plastic wrap. Refrigerate for at least one hour or overnight until firm.
Step 3: Roll and Cut
Preheat your oven to 375°F (190°C) and line baking sheets with parchment paper. On a lightly floured surface, roll out one disc of chilled dough to about 1/4-inch thickness, feeling its pliable texture. Use a 3-inch round cookie cutter to cut out your baseball shapes, carefully placing them on the prepared baking sheets.
Step 4: Bake to Golden Perfection
Bake for 10-12 minutes, or until the edges are lightly golden, indicating they are perfectly cooked. The cookies should still be pale in the center, ensuring they remain tender. Let them cool on the baking sheets for a few minutes before transferring them to a wire rack to cool completely.
Step 5: Mix the Royal Icing
In a large bowl, combine the powdered sugar and meringue powder, whisking well to remove any lumps. Gradually add the warm water, mixing on low speed until the icing comes together. Increase speed to high and beat for 5-7 minutes until stiff, glossy peaks form, achieving a smooth, spreadable consistency.
Step 6: Decorate Your Baseballs
Divide the white royal icing, setting a small portion aside and coloring the rest with a few drops of red gel food coloring. Flood the cooled round baseball cookies with the white icing, ensuring even coverage, and allow it to dry completely. Pipe two curved red seams onto each white baseball cookie, mimicking the stitches for an authentic look.
Why You’ll Love It
These classic baseball cookies are perfect for any game day gathering, offering a delightful canvas for creativity. You can easily swap vanilla extract for almond or lemon for a different flavor profile. Consider using different sized cutters to create a whole league of various “baseball” sizes.
2. Chewy Chocolate Chip Baseball Cookies

These chocolate chip baseball cookies bring a comforting, familiar flavor with a festive twist, making them a family favorite. Each soft, chewy cookie is loaded with rich chocolate chips and finished with vibrant red gel icing to resemble the seams of a baseball. The aroma of warm chocolate and vanilla will fill your kitchen, creating an inviting atmosphere.
- Preparation Time: 20 minutes
- Cooking Time: 10-12 minutes
- Servings: 24 cookies
- Estimated Nutrition Info: Per cookie: Calories 210, Fat 11g, Carbs 26g, Protein 3g
Ingredients
| Ingredient | Quantity |
|---|---|
| All-purpose flour | 2 1/4 cups |
| Baking soda | 1 tsp |
| Salt | 1/2 tsp |
| Unsalted butter, softened | 1 cup |
| Granulated sugar | 3/4 cup |
| Brown sugar, packed | 3/4 cup |
| Large eggs | 2 |
| Vanilla extract | 2 tsp |
| Semi-sweet chocolate chips | 2 cups |
| White decorator icing | 1 tube (for base) |
| Red gel food coloring/icing | 1 tube (for seams) |
Step by Step Instructions How to make
Step 1: Whisk Dry Ingredients
In a medium bowl, combine the all-purpose flour, baking soda, and salt, whisking thoroughly to ensure they are evenly distributed. This step is crucial for consistent cookie texture and proper rising. Set the bowl aside.
Step 2: Cream Wet Ingredients
In a large bowl, beat the softened butter with both granulated sugar and packed brown sugar until the mixture is light and fluffy. This usually takes about 2-3 minutes of vigorous beating. Add the eggs one at a time, mixing well after each addition, then stir in the vanilla extract until fully incorporated.
Step 3: Combine and Fold
Gradually add the dry ingredients to the wet mixture, mixing on low speed until just combined. Be careful not to overmix the dough, as this can lead to tough cookies. Fold in the chocolate chips, distributing them evenly throughout the luscious dough.
Step 4: Scoop and Bake
Preheat your oven to 375°F (190°C) and line baking sheets with parchment paper. Drop rounded tablespoons of dough onto the prepared sheets, leaving ample space between each cookie for spreading. Bake for 10-12 minutes, or until the edges are golden brown and the centers are still soft, creating that perfect chewy texture.
Step 5: Cool and Decorate
Allow the cookies to cool on the baking sheets for a few minutes, appreciating their warm, inviting scent. Transfer them to a wire rack to cool completely before decorating. Once fully cooled, use white decorator icing to create a smooth, round base, then pipe two curved red seams onto each cookie to mimic a baseball, making them festive and fun.
Why You’ll Love It
These chocolate chip baseball cookies are a fantastic crowd-pleaser, easy to make and universally loved. For an extra twist, try adding chopped nuts like pecans or walnuts to the dough. You can also use milk chocolate or dark chocolate chips depending on your preference, or even a mix for varied sweetness.
3. No-Bake Rice Krispie Treat Baseballs

For a quick win, these no-bake rice krispie treat baseballs are an absolute home run, requiring minimal effort but delivering maximum fun. Each chewy, marshmallowy sphere is coated in white chocolate and adorned with red gel icing seams. They’re a fantastic option when you need a speedy, delicious snack.
- Preparation Time: 20 minutes
- Chilling Time: 30 minutes
- Servings: 16 balls
- Estimated Nutrition Info: Per ball: Calories 150, Fat 5g, Carbs 25g, Protein 1g
Ingredients
| Ingredient | Quantity |
|---|---|
| Unsalted butter | 1/4 cup |
| Mini marshmallows | 10 oz bag |
| Rice Krispies cereal | 6 cups |
| White chocolate chips | 12 oz |
| Shortening or coconut oil | 1 tbsp |
| Red gel food coloring | A few drops |
Step by Step Instructions How to make
Step 1: Melt Marshmallows
In a large saucepan, melt the butter over low heat until it’s fully liquefied, releasing a buttery aroma. Add the mini marshmallows and stir continuously until they are completely melted and smooth, forming a glossy, sticky mixture. This step requires patience to avoid scorching.
Step 2: Combine Cereal
Remove the saucepan from the heat and gently fold in the Rice Krispies cereal until it is thoroughly coated with the melted marshmallow mixture. Work quickly but carefully to ensure every crispy piece gets covered. The mixture will be sticky, but incredibly aromatic and tempting.
Step 3: Shape the Baseballs
Lightly grease your hands with butter or cooking spray. Take approximately 1/4 cup of the warm Rice Krispies mixture and roll it firmly into a smooth ball. Repeat this process until all the mixture is used, forming neat, round baseball shapes. Place the finished balls on a parchment-lined baking sheet.
Step 4: Chill and Melt Chocolate
Chill the Rice Krispie balls in the refrigerator for at least 30 minutes to help them firm up and hold their shape. While they are chilling, melt the white chocolate chips with shortening or coconut oil in a microwave-safe bowl. Heat in 30-second intervals, stirring until completely smooth and creamy.
Step 5: Dip and Decorate
Dip each chilled Rice Krispie ball into the melted white chocolate, ensuring it’s fully coated, then place it back on the parchment-lined baking sheet. Let the chocolate set, either at room temperature or by refrigerating for 15-20 minutes. Once set, use red gel food coloring to pipe two curved seams onto each ball, completing your festive baseball cookies.
Why You’ll Love It
These no-bake baseball cookies are perfect for busy game days or when little hands want to help. They are incredibly versatile; consider adding a few drops of almond extract to the marshmallow mixture for a different flavor. You can also press them into a pan and cut out squares for “bases” instead of balls.
4. Peanut Butter Baseball Cookies with Red Seams

These soft and chewy peanut butter baseball cookies are a delightful blend of rich, nutty flavor and classic game-day charm. Each golden-brown cookie offers a comforting, buttery taste with a signature crisscross pattern, subtly enhancing the baseball theme before the red seams are added. They evoke a sense of nostalgic warmth.
- Preparation Time: 25 minutes
- Cooking Time: 10-12 minutes
- Servings: 24 cookies
- Estimated Nutrition Info: Per cookie: Calories 190, Fat 10g, Carbs 20g, Protein 4g
Ingredients
| Ingredient | Quantity |
|---|---|
| All-purpose flour | 1 3/4 cups |
| Baking soda | 1 tsp |
| Salt | 1/2 tsp |
| Unsalted butter, softened | 1/2 cup |
| Creamy peanut butter | 1 cup |
| Granulated sugar | 1/2 cup |
| Brown sugar, packed | 1/2 cup |
| Large egg | 1 |
| Vanilla extract | 1 tsp |
| Red gel food coloring | A few drops |
| White decorator icing (for base) | 1 tube (optional) |
Step by Step Instructions How to make
Step 1: Whisk Dry Ingredients
In a medium bowl, combine the all-purpose flour, baking soda, and salt, whisking them together thoroughly. This ensures even distribution and prevents any salty or overly leavened spots in your delicious cookies. Set aside, ready for the next step.
Step 2: Cream Wet Ingredients
In a large mixing bowl, cream together the softened butter, creamy peanut butter, granulated sugar, and packed brown sugar. Beat until the mixture is light, fluffy, and beautifully smooth, which usually takes about 2-3 minutes. Incorporate the large egg and vanilla extract, mixing until everything is fully combined.
Step 3: Combine Dough
Gradually add the dry ingredients to the wet mixture, mixing on low speed until just combined. Be careful not to overmix, as this can result in tough cookies; stop as soon as the flour streaks disappear. The dough will feel soft and slightly sticky, perfectly pliable for shaping.
Step 4: Roll and Press
Preheat your oven to 350°F (175°C) and line baking sheets with parchment paper. Roll the dough into 1-inch balls, feeling the smooth, slightly oily texture of the peanut butter dough. Place them about 2 inches apart on the prepared sheets, then use a fork to gently press a crisscross pattern onto each ball, flattening them slightly.
Step 5: Bake and Cool
Bake for 10-12 minutes, or until the edges are lightly golden, signaling they are perfectly baked. The centers should still look soft, ensuring a wonderfully chewy cookie. Let them cool on the baking sheets for a few minutes before transferring them to a wire rack to cool completely.
Step 6: Decorate with Seams
Once the peanut butter cookies are completely cool, you can optionally give them a white base coat using white decorator icing for a more classic baseball look, allowing it to set. Then, use red gel food coloring or red decorator icing to pipe two distinct curved seams onto each cookie, transforming them into festive baseball cookies.
Why You’ll Love It
These peanut butter baseball cookies are a delightful variation, offering a rich, comforting flavor that everyone adores. To make them extra special, press a mini peanut butter cup into the center of each cookie immediately after baking. You can also drizzle them with melted chocolate for added decadence.
5. Red Velvet Baseball Whoopie Pies
These elegant red velvet baseball whoopie pies offer a sophisticated, moist, and slightly tangy cake-like cookie paired with a luscious cream cheese filling. Their vibrant red hue makes them naturally festive, especially when decorated with stark white “seams.” Each bite is a luxurious, soft, and creamy experience.
- Preparation Time: 30 minutes
- Cooking Time: 10-12 minutes
- Servings: 12 whoopie pies (24 cookies)
- Estimated Nutrition Info: Per pie: Calories 320, Fat 18g, Carbs 35g, Protein 4g
Ingredients
| Ingredient | Quantity |
|---|---|
| All-purpose flour | 2 cups |
| Unsweetened cocoa powder | 2 tbsp |
| Baking soda | 1 tsp |
| Salt | 1/4 tsp |
| Buttermilk | 1 cup |
| Red gel food coloring | 1-2 tbsp |
| Vanilla extract | 2 tsp |
| Unsalted butter, softened | 1/2 cup |
| Granulated sugar | 1 cup |
| Large egg | 1 |
| Cream cheese, softened | 8 oz |
| Unsalted butter, softened | 1/2 cup |
| Powdered sugar | 3-4 cups |
| Red decorator icing (for seams) | 1 tube |
Step by Step Instructions How to make
Step 1: Mix Dry Ingredients
In a medium bowl, whisk together the flour, cocoa powder, baking soda, and salt, ensuring a uniform mixture. The cocoa adds depth, while baking soda provides lift. This precise blend is key for the tender, cake-like texture of these baseball cookies.
Step 2: Prepare Wet Ingredients
In a separate bowl, combine the buttermilk, red gel food coloring, and vanilla extract. Stir until the color is vibrant and evenly distributed. The buttermilk provides a subtle tang and helps activate the baking soda, creating a wonderfully moist crumb.
Step 3: Cream Butter and Sugar
In a large mixing bowl, cream the softened unsalted butter and granulated sugar until light and fluffy. This step incorporates air, making the whoopie pie cookies tender. Beat in the large egg, mixing until fully combined and smooth, creating a luscious base.
Step 4: Combine Dough
Alternately add the dry ingredient mixture and the buttermilk mixture to the creamed butter and sugar, beginning and ending with the dry ingredients. Mix on low speed until just combined, ensuring not to overmix the beautiful red batter. Overmixing can lead to tough whoopie pies.
Step 5: Bake the Cookies
Preheat your oven to 350°F (175°C) and line baking sheets with parchment paper. Drop rounded tablespoons of batter onto the prepared sheets, leaving space for spreading, appreciating their vibrant red hue. Bake for 10-12 minutes, or until the edges are set and the centers spring back when lightly touched.
Step 6: Prepare Cream Cheese Filling
While the cookies cool, prepare the cream cheese filling. In a medium bowl, beat the softened cream cheese and 1/2 cup softened butter until smooth and creamy. Gradually add the powdered sugar, one cup at a time, beating until light, fluffy, and deliciously pipeable, achieving a perfect consistency for filling your red velvet baseball cookies.
Step 7: Assemble and Decorate
Once the red velvet cookies are completely cool, spread a generous amount of cream cheese filling onto the flat side of one cookie. Top with another cookie to form a sandwich, gently pressing them together. Finally, use red decorator icing to pipe two distinct curved seams onto the top of each whoopie pie, mimicking a baseball.
Why You’ll Love It
These red velvet baseball whoopie pies are a showstopper, offering a unique texture and irresistible flavor for game day. For an extra touch, you could add a hint of almond extract to the cookie batter. Consider using a small amount of white food coloring in your cream cheese filling to make it even brighter.
6. Mini M&M “Stadium Lights” Sugar Cookies
These playful sugar cookies capture the excitement of a night game under stadium lights, featuring vibrant M&Ms scattered across a classic sugar cookie base. Each bite delivers a delightful crunch from the candies and a tender, buttery cookie. They’re simple to make and incredibly fun to decorate, perfect for a lively game day spread.
- Preparation Time: 40 minutes
- Cooking Time: 10-12 minutes
- Servings: 24 cookies
- Estimated Nutrition Info: Per cookie: Calories 195, Fat 9g, Carbs 27g, Protein 2g
Ingredients
| Ingredient | Quantity |
|---|---|
| All-purpose flour | 3 cups |
| Baking powder | 1 tsp |
| Salt | 1/2 tsp |
| Unsalted butter, softened | 1 cup |
| Granulated sugar | 1 cup |
| Large egg | 1 |
| Vanilla extract | 2 tsp |
| Mini M&M’s candies | 1 cup |
| White decorator icing (for base) | 1 tube |
| Red gel food coloring/icing | 1 tube (for seams) |
Step by Step Instructions How to make
Step 1: Whisk Dry Ingredients
In a medium bowl, combine the all-purpose flour, baking powder, and salt, whisking thoroughly to ensure even distribution. This initial step is vital for a consistent cookie texture and proper rise. Set this perfectly blended mixture aside.
Step 2: Cream Wet Ingredients
In a large bowl, cream the softened unsalted butter and granulated sugar until the mixture becomes light and fluffy, usually taking about 3 minutes. Beat in the large egg and vanilla extract, scraping down the sides of the bowl to ensure all ingredients are well incorporated, forming a smooth, aromatic base.
Step 3: Form the Dough
Gradually add the dry ingredients to the wet mixture, mixing on low speed until just combined and a soft dough forms. Be careful not to overmix, as this can lead to tough cookies. Gently fold in the mini M&M’s candies, distributing their vibrant colors evenly throughout the dough.
Step 4: Chill and Roll
Divide the dough in half, flatten each portion into a disc, and wrap tightly in plastic wrap. Refrigerate for at least one hour or overnight until the dough is firm and easy to handle. This chilling step prevents spreading, ensuring your baseball cookies hold their shape.
Step 5: Cut and Bake
Preheat your oven to 375°F (190°C) and line baking sheets with parchment paper. On a lightly floured surface, roll out one disc of dough to about 1/4-inch thickness, feeling its pliable texture. Use a 3-inch round cookie cutter to create your baseball shapes, carefully placing them on the prepared baking sheets. Bake for 10-12 minutes, or until the edges are lightly golden, indicating perfect doneness.
Step 6: Cool and Decorate
Let the cookies cool on the baking sheets for a few minutes before transferring them to a wire rack to cool completely. Once fully cooled, use white decorator icing to create a smooth, round base, then pipe two curved red seams onto each baseball cookie, mimicking the stitches. The colorful M&Ms will peek through, adding a “stadium lights” effect.
Why You’ll Love It
These M&M “Stadium Lights” baseball cookies are a fantastic way to engage kids in the kitchen, offering both fun baking and decorating. You can customize the M&M colors to match your favorite team. Feel free to swap out the mini M&Ms for regular size or even chocolate chips for a different texture.
7. Lemon Zest Shortbread Baseball Cookies
These lemon zest shortbread baseball cookies are a bright, buttery, and beautifully crumbly delight, offering a refreshing counterpoint to richer game day snacks. The subtle citrus aroma invigorates the senses, while their melt-in-your-mouth texture is simply divine. A simple glaze and red seams complete their festive look.
- Preparation Time: 30 minutes
- Chilling Time: 1 hour
- Cooking Time: 15-18 minutes
- Servings: 24 cookies
- Estimated Nutrition Info: Per cookie: Calories 160, Fat 10g, Carbs 17g, Protein 1g
Ingredients
| Ingredient | Quantity |
|---|---|
| All-purpose flour | 2 1/4 cups |
| Granulated sugar | 1/2 cup |
| Lemon zest | 2 tbsp |
| Salt | 1/4 tsp |
| Unsalted butter, cold, cubed | 1 cup |
| Powdered sugar | 2 cups |
| Lemon juice | 2 tbsp |
| Milk | 1-2 tbsp |
| Red gel food coloring | A few drops |
Step by Step Instructions How to make
Step 1: Whisk Dry Ingredients
In a large bowl, whisk together the all-purpose flour, granulated sugar, fresh lemon zest, and salt. The lemon zest infuses the dry ingredients with a bright, aromatic fragrance, laying the foundation for these delicious baseball cookies. Ensure everything is well combined for even flavor.
Step 2: Cut in Butter
Add the cold, cubed unsalted butter to the dry ingredients. Using your fingertips or a pastry blender, cut the butter into the flour mixture until it resembles coarse crumbs, with some pea-sized pieces remaining. This creates the signature tender, crumbly texture of shortbread.
Step 3: Form and Chill Dough
Gently bring the dough together with your hands, pressing it until it forms a cohesive ball. Be careful not to overwork the dough. Flatten it into a disc, wrap tightly in plastic wrap, and refrigerate for at least one hour to allow the butter to firm up, ensuring perfect baseball cookie shapes.
Step 4: Roll and Cut
Preheat your oven to 325°F (160°C) and line baking sheets with parchment paper. On a lightly floured surface, roll out the chilled dough to about 1/4-inch thickness, feeling its smooth, cool texture. Use a 3-inch round cookie cutter to cut out your baseball shapes, carefully transferring them to the prepared sheets.
Step 5: Bake to Perfection
Bake for 15-18 minutes, or until the edges are lightly golden and the cookies are firm to the touch. The cookies should still be pale overall, maintaining their delicate shortbread characteristics. Let them cool on the baking sheets for a few minutes before transferring to a wire rack to cool completely.
Step 6: Prepare Glaze and Decorate
In a small bowl, whisk together the powdered sugar, lemon juice, and milk until a smooth, pourable glaze forms. The fresh lemon juice adds a wonderful zing. Once the shortbread cookies are completely cool, drizzle or spread the white glaze over them, then use red gel food coloring to pipe two curved seams onto each baseball cookie, completing their festive look.
Why You’ll Love It
These lemon zest shortbread baseball cookies are a refreshing change for game day, offering a light and zesty flavor. You can adjust the amount of lemon zest to your taste for a stronger citrus punch. For a slightly different twist, try orange zest instead of lemon, providing an equally delightful aroma.
8. Chocolate Fudge Baseball Cookies
These chocolate fudge baseball cookies are a dark, rich, and intensely satisfying treat, boasting a wonderfully chewy texture reminiscent of a brownie. Their deep chocolate flavor is perfect for serious chocolate lovers, and the contrasting white chocolate drizzle for the seams creates a stunning visual. They offer a luxurious, comforting bite.
- Preparation Time: 25 minutes
- Cooking Time: 10-12 minutes
- Servings: 24 cookies
- Estimated Nutrition Info: Per cookie: Calories 220, Fat 12g, Carbs 27g, Protein 3g
Ingredients
| Ingredient | Quantity |
|---|---|
| All-purpose flour | 1 1/2 cups |
| Unsweetened cocoa powder | 3/4 cup |
| Baking soda | 1 tsp |
| Salt | 1/2 tsp |
| Unsalted butter, softened | 1 cup |
| Granulated sugar | 1 1/2 cups |
| Large eggs | 2 |
| Vanilla extract | 2 tsp |
| White chocolate chips | 1 cup |
| Shortening or coconut oil | 1/2 tsp |
Step by Step Instructions How to make
Step 1: Combine Dry Ingredients
In a medium bowl, whisk together the all-purpose flour, unsweetened cocoa powder, baking soda, and salt, ensuring they are thoroughly blended. The cocoa powder contributes to the deep, rich color and intense flavor of these fudgy baseball cookies, making them undeniably decadent.
Step 2: Cream Wet Ingredients
In a large mixing bowl, cream the softened unsalted butter and granulated sugar until the mixture is light and fluffy, typically taking about 3-4 minutes. Beat in the large eggs one at a time, incorporating each fully, then stir in the vanilla extract until the mixture is smooth and beautifully aromatic.
Step 3: Mix the Dough
Gradually add the dry ingredients to the wet mixture, mixing on low speed until just combined. Be careful not to overmix, as this can develop the gluten too much, leading to tougher cookies. The dough will be thick, dark, and wonderfully fragrant with chocolate.
Step 4: Scoop and Bake
Preheat your oven to 350°F (175°C) and line baking sheets with parchment paper. Drop rounded tablespoons of the rich chocolate dough onto the prepared sheets, leaving ample space between each for spreading. Bake for 10-12 minutes, or until the edges are set and the centers still look slightly soft, ensuring a delightfully fudgy texture.
Step 5: Cool and Melt White Chocolate
Allow the cookies to cool on the baking sheets for a few minutes, filling your kitchen with an intoxicating chocolate aroma. Transfer them to a wire rack to cool completely. While they cool, melt the white chocolate chips with shortening or coconut oil in a microwave-safe bowl, heating in 30-second intervals and stirring until completely smooth and creamy.
Step 6: Decorate Your Baseballs
Once the chocolate fudge cookies are completely cool, transfer the melted white chocolate to a piping bag with a small round tip, or a Ziploc bag with a tiny corner snipped off. Pipe two distinct curved seams onto each dark cookie, mimicking the stitches of a baseball, creating a striking contrast.
Why You’ll Love It
These chocolate fudge baseball cookies are a dream for any chocolate enthusiast, offering a rich, decadent treat for game day. Consider adding a pinch of espresso powder to the dough to deepen the chocolate flavor even further. A sprinkle of sea salt before baking can also enhance their complex taste.
Frequently Asked Questions About Baseball Cookies
These common questions help you master the art of making perfect baseball cookies every time, ensuring your game day treats are a resounding success. We’ve answered them based on years of baking experience.
How do I prevent my sugar cookies from spreading too much?
The key to preventing cookie spread is proper chilling of the dough. Chilling butter-based dough for at least an hour, or even overnight, firms up the fat, which melts slower in the oven. Additionally, ensure your butter isn’t too soft when you start, and avoid overworking the dough, which can develop gluten.
Can I make these baseball cookies ahead of time?
Absolutely! Most of these baseball cookie doughs can be prepared a day or two in advance and stored in the refrigerator, tightly wrapped. Baked, undecorated cookies can be stored in an airtight container at room temperature for up to 3-4 days. Decorated cookies will last similarly, though royal icing dries hard.
What’s the best way to store decorated baseball cookies?
Store decorated baseball cookies in an airtight container at room temperature. If using royal icing, they can be stacked once fully dry (which takes several hours). For softer icings, store them in a single layer or separate layers with parchment paper to prevent sticking and smudging, preserving their perfect appearance.
Can I freeze baseball cookies?
Yes, both baked and unbaked baseball cookie dough can be frozen successfully. Wrap unbaked dough discs tightly in plastic wrap and foil for up to 3 months. Baked, unfrosted cookies freeze well in airtight containers for up to 2 months; thaw at room temperature before decorating, maintaining freshness.
What if I don’t have red gel food coloring for the seams?
No problem! You can easily create red seams using various alternatives. Red icing in a tube from the baking aisle works perfectly for convenience. Alternatively, you can mix a small amount of powdered sugar with a few drops of milk and red liquid food coloring to create a simple, thick glaze.
Play Ball and Bake!
We hope these eight fantastic baseball cookie recipes ignite your game day spirit and inspire some delicious kitchen adventures. From classic sugar cookies to fudgy chocolate delights, there’s a perfect treat for every fan and every palate. These recipes have brought joy to countless gatherings in our own home.
So, whether you’re hosting a big party or enjoying a quiet evening game with family, these baseball cookies are sure to be a hit. Bookmark this page, gather your ingredients, and get ready to create some unforgettable memories. Happy baking, and may your favorite team win!